Harvesting Happiness: How to Grow Peaches from Seeds in Your Garden
Share
Table of Contents
1. Introduction
Growing peaches from seeds is a delightful journey that connects you to nature and rewards you with the sweet taste of fresh fruit. There’s something incredibly satisfying about nurturing a tiny seed into a thriving tree, which ultimately produces juicy, sun-kissed peaches. This process not only enriches your gardening skills but also adds a personal touch to your home garden.
Understanding how to grow peaches from seeds is crucial for several reasons:
-
Successful Growth:
- Each step of the growing process plays a significant role in the overall health of your peach tree.
- Knowledge about seed selection, soil preparation, and care ensures higher chances of germination and fruitful harvests.
-
Enjoying the Process:
- Gardening is a rewarding hobby that can reduce stress and provide a sense of accomplishment.
- Engaging with the growth cycle of your plants allows you to appreciate the beauty of nature.
-
Harvesting the Rewards:
- Homegrown peaches are not only fresher and tastier than store-bought options but also free from harmful pesticides.
- Growing your own fruit allows you to enjoy the satisfaction of eating produce cultivated with care and dedication.
In this guide, you will learn the essential steps to successfully grow peaches from seeds, transforming your garden into a fruitful oasis filled with delectable peaches. So, let's dig into the wonderful world of peach cultivation and discover how you can bring this delicious fruit to your backyard!

2. Choosing the Right Peach Variety
Selecting the right peach variety is crucial for ensuring a successful growing experience and a bountiful harvest. With numerous options available, it's essential to understand the different types of peaches and which varieties thrive best in your specific climate.
2.1 Overview of Popular Peach Varieties for Home Growing
When it comes to peaches, there are two main types based on the way the flesh adheres to the pit:
-
Clingstone Peaches:
- The flesh clings to the pit, making them more challenging to eat fresh but excellent for canning and cooking.
- Popular varieties include:
- ‘Elberta’ – Known for its sweetness and juiciness.
- ‘Glohaven’ – A reliable variety with excellent flavor.
-
Freestone Peaches:
- The flesh easily separates from the pit, making them ideal for eating fresh and desserts.
- Popular varieties include:
- ‘Redhaven’ – Early ripening and great flavor.
- ‘Suncrest’ – A favorite for its sweetness and aroma.
2.2 Best Varieties for Different Climates
Different peach varieties thrive in various climates. Here are some recommendations based on your location:
-
Temperate Climates:
- ‘Reliance’ – A hardy variety that withstands cold winters.
- ‘Harmony’ – Known for its adaptability and disease resistance.
-
Warm Climates:
- ‘Florida King’ – Ideal for warmer regions with its heat tolerance.
- ‘La Feliciana’ – Thrives in hot conditions and produces large fruit.
-
Subtropical Climates:
- ‘Tropic Beauty’ – A low-chill variety perfect for subtropical areas.
- ‘Tropic Sweet’ – Excellent for warmer regions with consistent fruiting.
2.3 Factors to Consider When Selecting Seeds
In addition to the variety, consider the following factors to ensure you choose the best seeds for your garden:
-
Climate Suitability:
- Research your hardiness zone and select varieties known to thrive in your area.
-
Fruit Characteristics:
- Consider flavor, texture, and size preferences for your intended use.
-
Growth Habit:
- Choose between dwarf or standard-sized trees based on your available space.
-
Resistance to Diseases:
- Opt for varieties with resistance to common peach diseases, such as peach leaf curl.

3. Preparing Your Seeds
3.1 Collecting Seeds
Collecting seeds from ripe peaches is the first step in the journey of growing your own peach trees. Here’s how to do it:
-
How to Extract Seeds from Ripe Peaches:
- Choose ripe peaches that are free from blemishes and pests. Look for fruit that is slightly soft to the touch and fragrant.
- Cut the peach in half and gently twist to separate the two halves, revealing the pit inside.
- Carefully pry the pit out of the fruit using your fingers or a spoon.
- Repeat this process for multiple peaches to ensure you have enough seeds for planting.
-
Tips for Selecting Healthy Fruit:
- Opt for organic peaches when possible, as they are less likely to be treated with chemicals that can affect seed viability.
- Choose fruit that is fully ripe, as under-ripe peaches may not yield viable seeds.
- Inspect the peaches for any signs of rot or disease, as these can compromise the seeds inside.
3.2 Cleaning and Drying
Once you’ve extracted the seeds, proper cleaning and drying are essential to prepare them for storage and planting.
-
Proper Methods for Cleaning the Seeds:
- Remove any remaining fruit flesh from the seeds by rinsing them under running water. This prevents mold and improves germination rates.
- Use a soft brush or cloth to gently scrub the seeds if needed, ensuring they are completely clean.
- After rinsing, place the seeds on a paper towel to absorb excess moisture.
-
Importance of Drying Before Storage:
- Drying the seeds thoroughly is crucial to prevent mold growth during storage. It helps maintain seed viability.
- Spread the cleaned seeds on a dry surface in a cool, dark place for several days to ensure they are completely dry.
- Once dried, store the seeds in a paper envelope or a glass jar with a lid, keeping them in a cool, dry location until you're ready to plant.
4. Stratification: The Key to Germination
Stratification is a crucial process in seed germination, particularly for peaches, which require specific conditions to break dormancy. This process mimics the natural winter conditions that seeds would experience in the wild, allowing them to sprout successfully when the time is right. Understanding the importance of stratification can greatly enhance your success in growing peaches from seeds.
Seed stratification is essential for several reasons:
-
Breaking Dormancy:
- Many fruit seeds, including peaches, have a hard outer shell that prevents germination until specific conditions are met.
- Stratification softens this outer layer, allowing moisture to penetrate and initiating the germination process.
-
Ensuring Successful Germination:
- By providing the right temperature and moisture conditions, stratification significantly increases the likelihood of seed sprouting.
- It helps align the germination process with the optimal growing season, ensuring that young plants can thrive.
4.1 Cold Stratification
Cold stratification is the most common method used for peach seeds, replicating winter conditions to prepare them for spring germination. Here’s a step-by-step guide on how to perform cold stratification:
-
Gather Materials:
- Peach seeds
- A damp paper towel or sphagnum moss
- A resealable plastic bag or airtight container
- A refrigerator
-
Moisten the Towel or Moss:
- Lightly dampen a paper towel or sphagnum moss. It should be moist but not dripping wet.
-
Wrap the Seeds:
- Place the peach seeds in the center of the damp paper towel or moss and fold it over to cover them completely.
-
Seal and Refrigerate:
- Place the wrapped seeds in a resealable plastic bag or airtight container to prevent moisture loss.
- Store the bag or container in the refrigerator for the required duration.
-
Duration and Conditions Required:
- Cold stratification typically lasts between 30 to 60 days, depending on the peach variety.
- Maintain a temperature of around 34°F to 40°F (1°C to 4°C) in the refrigerator.
4.2 Warm Stratification
Warm stratification is an alternative method used for some peach varieties that may not require cold treatment. This process involves simulating warmer conditions to initiate germination. Here’s when to use warm stratification and how to do it:
-
When to Use Warm Stratification:
- If you’re growing peach varieties known to benefit from warmer conditions.
- Warm stratification can be particularly useful for seeds that need less chilling or those adapted to milder climates.
-
Process and Timing:
- Prepare the seeds similarly to cold stratification, using a damp paper towel or sphagnum moss.
- Instead of refrigerating, place the wrapped seeds in a warm, humid environment, such as a seed-starting tray or a warm area of your home.
- Keep the seeds at a temperature of around 70°F to 85°F (21°C to 29°C) for about 30 days.
- Monitor the moisture level, ensuring the towel or moss remains damp but not saturated.

5. Planting Your Peach Seeds
Once you have prepared your peach seeds through stratification, the next step is planting them in a suitable environment. Proper planting techniques are essential to ensure your seeds germinate successfully and grow into healthy peach trees. This section will guide you through preparing the soil and sowing your seeds effectively.
5.1 Preparing the Soil
The soil plays a critical role in the growth of your peach trees, as it provides the necessary nutrients and support for root development. Here’s how to prepare the ideal soil for planting peach seeds:
-
Ideal Soil Composition for Peaches:
- Peach trees thrive in well-draining soil with a pH level between 6.0 and 7.0.
- A mix of sandy loam and clay is ideal, allowing for good drainage while retaining some moisture.
- Incorporate organic matter, such as compost or well-rotted manure, to enrich the soil and improve its structure.
-
Tips for Soil Preparation and Amendment:
- Conduct a soil test to determine the nutrient content and pH level. Amend the soil based on the results to ensure optimal conditions for peach growth.
- Clear the planting area of weeds and debris to prevent competition for nutrients.
- Till the soil to a depth of at least 12 inches to enhance aeration and root penetration.
- Consider adding slow-release fertilizers, such as a balanced 10-10-10 formula, to provide essential nutrients as the seeds begin to sprout.
5.2 Sowing Seeds
After preparing the soil, it’s time to sow your peach seeds. Proper planting techniques will promote healthy germination and growth. Here are the best practices for sowing seeds:
-
Best Practices for Planting Seeds:
- Choose a planting date in early spring after the last frost to ensure favorable conditions for germination.
- Moisten the soil lightly before planting to create a suitable environment for the seeds.
-
Depth, Spacing, and Care After Planting:
- Plant the seeds about 1 to 2 inches deep in the soil, as this helps protect them from temperature fluctuations.
- Space the seeds approximately 10 to 15 inches apart to allow ample room for growth and root development.
- After planting, cover the seeds lightly with soil and gently pat down to remove air pockets.
- Water the planting area thoroughly, ensuring that the soil is consistently moist but not waterlogged.
- Once the seeds begin to sprout, thin out the seedlings to ensure that the strongest plants have enough space to grow.
6. Caring for Your Seedlings
Once your peach seeds have germinated and developed into seedlings, proper care is essential for their growth and development. This section will cover key aspects of caring for your seedlings, including watering and fertilizing, as well as managing their sunlight and temperature requirements.
6.1 Watering and Fertilizing
Watering and fertilizing are crucial components of seedling care that ensure your young peach trees have the nutrients and moisture they need to thrive.
-
Proper Watering Techniques:
- Water your seedlings deeply and thoroughly, allowing the moisture to penetrate the soil to the root zone.
- Check the soil moisture regularly; water when the top inch of soil feels dry to the touch.
- Avoid overwatering, which can lead to root rot. Ensure that the soil drains well to prevent waterlogging.
- Consider using a drip irrigation system or watering can to deliver water directly to the base of the plants, minimizing moisture on the leaves.
-
Types of Fertilizers Suitable for Young Plants:
- Start fertilizing your seedlings about 4 to 6 weeks after germination with a balanced, water-soluble fertilizer.
- Look for fertilizers with an N-P-K ratio of 10-10-10 or similar, providing equal parts nitrogen, phosphorus, and potassium.
- Apply fertilizer every 4 to 6 weeks during the growing season, following the manufacturer's instructions for dilution and application.
- Consider using organic options, such as compost tea or fish emulsion, to provide nutrients while promoting healthy soil biology.
6.2 Sunlight and Temperature Requirements
Providing the right sunlight and temperature conditions is vital for the healthy growth of your peach seedlings. Here are the ideal conditions and tips for managing them:
-
Ideal Conditions for Healthy Growth:
- Peach seedlings thrive in full sun, requiring at least 6 to 8 hours of direct sunlight each day.
- Position your seedlings in a location where they receive ample sunlight, such as a south-facing window or outdoor garden bed.
- Ensure that the soil temperature is consistently warm, ideally between 65°F to 75°F (18°C to 24°C), to promote healthy root development.
-
Tips for Managing Temperature and Light:
- If growing indoors, consider using grow lights to supplement natural sunlight, especially during shorter days in early spring.
- Monitor the temperature closely, especially if your seedlings are outside. Use row covers or shade cloth if temperatures become excessively hot or cold.
- As the seedlings grow, gradually acclimate them to outdoor conditions by hardening them off—exposing them to outside conditions for a few hours each day before permanent planting.

7. Transplanting Your Peach Trees
Transplanting your peach seedlings is a significant step in their growth journey, moving them from their initial growing environment to a permanent home in your garden. This section will guide you on when and how to transplant seedlings, the importance of acclimation, and best practices for ensuring a successful transplant.
When and How to Transplant Seedlings
Timing and technique are crucial for the successful transplanting of peach seedlings:
-
Timing:
- Transplant seedlings in early spring or fall, when temperatures are mild and the risk of frost has passed.
- Ensure seedlings are at least 6 to 12 inches tall and have developed a healthy root system before transplanting.
-
How to Transplant:
- Prepare the new planting site by loosening the soil and incorporating organic matter.
- Water the seedlings thoroughly a day before transplanting to reduce shock and help retain moisture.
- Carefully remove the seedlings from their pots or containers, taking care not to damage the roots.
- Dig a hole in the new site that is twice as wide and just as deep as the root ball.
- Place the seedling in the hole, ensuring the top of the root ball is level with the soil surface, and backfill with soil.
Importance of Acclimating Seedlings to Outdoor Conditions
Acclimation is essential to help seedlings transition from a controlled environment to the unpredictability of outdoor conditions:
-
Gradual Acclimatization:
- Before transplanting, gradually expose seedlings to outdoor conditions by placing them outside for a few hours each day, increasing exposure time over one to two weeks.
- This process helps them adjust to wind, sunlight, and temperature changes, reducing transplant shock.
Best Practices for Transplanting to Ensure Survival
Implementing best practices during transplanting will help ensure your peach trees thrive in their new location:
-
Watering After Transplanting:
- Water the transplanted seedlings thoroughly right after planting to help settle the soil and eliminate air pockets around the roots.
- Continue to monitor soil moisture and water regularly for the first few weeks as the seedlings establish themselves.
-
Mulching:
- Apply a layer of mulch around the base of the seedlings to retain moisture, suppress weeds, and regulate soil temperature.
- Avoid piling mulch against the trunk to prevent rot.
-
Protection from Pests and Disease:
- Monitor for pests and diseases, especially during the first few weeks after transplanting.
- Consider using organic pest control methods if issues arise.
8. Long-Term Care for Peach Trees
Providing long-term care for your peach trees is essential to ensure they remain healthy, productive, and resistant to pests and diseases. This section covers key aspects of ongoing care, including pruning and training techniques and strategies for managing pests and diseases.
8.1 Pruning and Training
Pruning and training your peach trees properly is crucial for their growth, fruit production, and overall health. Here are the techniques and guidelines for effective pruning:
-
Techniques for Shaping Trees for Optimal Growth:
- Use the open center or vase-shaped method to encourage light penetration and air circulation in the tree canopy.
- Focus on removing any dead, damaged, or crossing branches to promote healthy growth and fruiting.
- Maintain a balanced structure by selectively thinning out branches, especially in crowded areas.
-
When and How to Prune Peach Trees:
- Prune peach trees in late winter or early spring, before new growth begins, to minimize stress and encourage healthy budding.
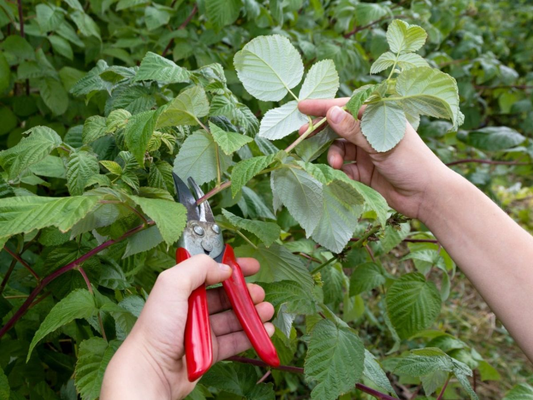
- Use clean, sharp pruning shears to make clean cuts, and avoid excessive pruning—remove no more than 20-30% of the tree's foliage at a time.
- Consider the age of the tree: young trees should be pruned to shape and promote branching, while mature trees benefit from regular thinning and maintenance pruning.
8.2 Pest and Disease Management
Protecting your peach trees from pests and diseases is vital for their longevity and productivity. Here’s what you need to know about common threats and treatment options:
-
Common Pests and Diseases That Affect Peach Trees:
- Pests: Look out for aphids, peach tree borers, and spider mites, which can harm your trees and reduce fruit quality.
- Diseases: Peach leaf curl, brown rot, and bacterial spot are common diseases that can affect peach trees, leading to reduced yields and health issues.
-
Organic and Chemical Treatment Options:
- For pest control, consider using insecticidal soaps, neem oil, or introducing beneficial insects like ladybugs to manage aphids and other pests.
- To manage diseases, practice crop rotation, remove and destroy infected plant material, and apply fungicides as a preventative measure when necessary.
- Regularly inspect your trees for signs of pests or diseases, and act quickly to mitigate any issues to ensure the health of your peach trees.

9. Harvesting Your Peaches
Harvesting your peaches at the right time and using proper techniques ensures the best flavor and quality. This section provides guidance on recognizing ripe peaches, best practices for picking, and tips for storing and enjoying your homegrown fruit.
Signs That Peaches Are Ripe and Ready to Harvest
Knowing when to harvest your peaches is crucial for optimal taste and texture. Look for the following signs of ripeness:
-
Color:
- Ripe peaches typically display a rich, vibrant color, with a golden-yellow or reddish hue depending on the variety.
-
Feel:
- Gently squeeze the peach; it should yield slightly to pressure, indicating softness.
-
Aroma:
- Ripe peaches emit a sweet, fragrant aroma that signals they are ready for harvesting.
Best Practices for Picking Peaches Without Damaging the Tree
Proper picking techniques are essential to avoid harming the tree or the fruit. Follow these best practices:
-
Use Care:
- Support the weight of the peach with your hand while gently twisting it off the branch.
- Avoid pulling or yanking the fruit, as this can damage the stem and tree branches.
-
Harvest in the Morning:
- Pick peaches early in the day when temperatures are cooler, reducing stress on the fruit and tree.
-
Check for Damaged Fruits:
- Inspect peaches for bruises or signs of disease, and remove any affected fruit to prevent spreading.
How to Store and Enjoy Your Homegrown Peaches
Proper storage is key to maintaining the quality of your harvested peaches. Here’s how to store and enjoy them:
-
Storage:
- Store unripe peaches at room temperature until they ripen fully, then transfer them to the refrigerator to extend freshness.
- For best flavor, consume peaches within a few days of ripening.
-
Enjoying Peaches:
- Enjoy fresh peaches as a snack, in salads, or as a topping for desserts.
- Consider canning, freezing, or making preserves to enjoy your peaches year-round.
10. Conclusion
Growing peaches from seeds is a rewarding journey that transforms your initial efforts into delicious, juicy fruit. From selecting the right peach variety and carefully preparing your seeds to nurturing seedlings and enjoying the harvest, each step is filled with excitement and learning. This process not only teaches patience and diligence but also connects you to nature and the joy of gardening.
If you’ve been inspired by the prospect of growing your own peaches, now is the perfect time to start. With the right knowledge and techniques, you can cultivate thriving peach trees in your garden. The satisfaction of biting into a homegrown peach, knowing you’ve nurtured it from seed, is unparalleled.
Remember, gardening is not just about the end result; it’s about the experiences and lessons learned along the way. Embrace the journey and relish the happiness that comes with growing your own food. So grab those seeds, dig into the earth, and embark on your peach-growing adventure!
11. Frequently Asked Questions (FAQ)
Here are some common questions regarding growing peaches from seeds, along with detailed answers to help guide your gardening journey.
-
Can I grow peaches from store-bought peaches?
- While it is possible to grow peaches from seeds taken from store-bought peaches, there are limitations:
- Many store-bought peaches are hybrids or treated to prevent sprouting, making it less likely that the seeds will germinate.
- For best results, use seeds from organic or heirloom peaches that are free of chemical treatments.
-
How long does it take to grow a peach tree from seed?
- The timeline for growing a peach tree from seed generally includes:
- Germination can take 2 to 3 weeks after stratification.
- Seedlings will typically take 3 to 4 years to mature and produce fruit after planting.
-
What is the best time of year to plant peach seeds?
- The best time to plant peach seeds is:
- Late winter to early spring, as this aligns with natural growth cycles.
- Stratifying the seeds beforehand can improve germination rates.
-
Do peach trees require a lot of maintenance?
- Peach trees do require some maintenance, including:
- Regular watering, especially during dry spells.
- Annual pruning to promote healthy growth and fruit production.
- Pest and disease management to ensure tree health.
-
Can I grow peaches in a container?
- Yes, peaches can be grown in containers! Consider these tips:
- Choose dwarf varieties that are suitable for container growth.
- Use a large pot (at least 15 gallons) with good drainage.
- Regularly monitor water and nutrient levels, as container plants can dry out quickly.
Additional Resources
Buy Flower Seeds Online: A Convenient Way to Start Your Dream Garden T – XRoci
Explore the Best Plants for Low Light Indoors and Create a Lush Retrea – XRoci
How to Start a Fruit Tree Nursery: An Eco-Friendly Business Plan for G – XRoci
How to Grow Lemon Trees Indoors: Essential Care Tips for Indoor Citrus – XRoci


