How to Care for Elderberry Bushes
Share
- 1. Introduction
- 2. Choosing the Right Location for Your Elderberry Bush
- 3. Selecting Elderberry Varieties
- 4. Planting Elderberry Bushes
- 5. Watering and Fertilizing Elderberry Bushes
- 6. Pruning Elderberry Bushes
- 7. Protecting Elderberry Bushes from Pests and Diseases
- 8. Harvesting Elderberries
- 9. Winter Care for Elderberry Bushes
- 10. Troubleshooting Common Elderberry Care Issues
- 11. Frequently Asked Questions
1. Introduction
Elderberry bushes have become increasingly popular among gardeners due to their multiple uses and easy maintenance. Known for their vibrant, dark berries and aromatic flowers, elderberries are a wonderful addition to any garden. This hardy shrub offers not only a burst of color in the landscape but also provides health benefits, culinary potential, and environmental value.
Overview of Elderberry Bushes:
- Scientific Name: Sambucus nigra (commonly known as Black Elderberry)
- Appearance: Elderberry bushes can grow from 3 to 12 feet tall with lush green leaves and clusters of small, fragrant white or cream-colored flowers.
- Fruit: Elderberries produce small, dark purple to black berries that are used in a variety of culinary applications such as jams, syrups, and wines.
- Growth Habit: They are fast-growing, deciduous shrubs that can thrive in a wide range of climates.
Why Elderberry Bushes Are a Great Addition to Your Garden:
- Low Maintenance: Elderberries require minimal care once established, making them a perfect choice for beginner gardeners.
- Attractive Foliage and Flowers: The bright flowers and deep green leaves offer ornamental value to your garden.
- Fast Growth: These bushes grow quickly, providing rapid coverage and a natural privacy screen.
Benefits of Growing Elderberries:
-
Health Benefits:
- Rich in antioxidants, elderberries have been known to boost immune function and help with cold and flu symptoms.
- They also contain vitamins A, B, and C, which support overall health and well-being.
-
Culinary Uses:
- The berries can be used in jams, jellies, syrups, and even wines, making them a versatile addition to any kitchen.
- The flowers can be made into elderflower syrup, which is a popular ingredient in cocktails and beverages.
-
Ornamental Value:
- Elderberry bushes add visual interest with their striking flowers, dark berries, and rich green foliage, enhancing the aesthetics of your garden.
- The bushes also provide habitat for birds and beneficial insects, making them a great addition to an environmentally friendly garden.

2. Choosing the Right Location for Your Elderberry Bush
Choosing the right location is essential for the healthy growth and fruitful production of elderberry bushes. Proper sunlight, soil conditions, and spacing all play crucial roles in the success of your elderberry plants. Here’s what to keep in mind when selecting the best spot for your elderberries:
Sunlight Requirements:
- Optimal Light Conditions: Elderberry bushes thrive in full sun to partial shade. They perform best with at least 6 hours of direct sunlight per day.
-
Effects of Too Much or Too Little Sunlight:
- Too much sunlight, especially in hotter climates, can cause leaf scorch and stress, leading to poor growth and reduced fruiting.
- Too little sunlight results in weak growth and fewer berries, as the plant struggles to photosynthesize effectively.
Soil Conditions:
- Ideal pH and Drainage: Elderberries prefer slightly acidic to neutral soil (pH 5.5–7.0) with well-draining properties. Sandy loam is ideal for healthy root development.
-
Improving Soil Quality:
- Amend soil with organic compost or aged manure to improve drainage and provide nutrients.
- If your soil is heavy clay, consider adding sand or organic matter to enhance its texture and drainage.
Spacing and Growth Area:
- Space Requirements: Each elderberry bush needs about 6 to 8 feet of space in all directions to allow for proper growth and air circulation.
- Impact of Overcrowding: Planting elderberries too close together can lead to reduced airflow, increasing the risk of disease and hindering their ability to produce fruit. Adequate spacing ensures the bushes can grow freely and receive sufficient sunlight.

3. Selecting Elderberry Varieties
Choosing the right variety of elderberry is key to successfully growing and harvesting your plants. Different varieties have varying growth habits, tastes, and uses. Understanding these differences will help you select the best elderberry variety for your garden and needs.
Common Elderberry Varieties:
- Black Elderberry (Sambucus nigra): The most common variety grown for fruit production, especially prized for its dark purple to black berries. It thrives in a variety of climates and is often used in culinary and medicinal applications.
- American Elderberry (Sambucus canadensis): Native to North America, this variety is well-suited for the U.S. climate. It has a slightly larger berry and is typically used for syrups, jams, and wine.
- European Elderberry (Sambucus ebulus): A smaller bush that produces berries with a stronger flavor. It is often used in herbal medicine, especially in Europe.
Comparing Varieties:
- Taste: Varieties like Black Elderberry are known for their slightly tart taste, while the American Elderberry has a milder flavor, and the European variety tends to be stronger and more bitter.
- Growth Habit: Black Elderberry is known for its robust growth, often reaching higher heights than the American or European varieties. American Elderberry generally grows taller and broader compared to European Elderberry, which tends to be smaller and more compact.
- Climate Preference: While all varieties are adaptable, Black Elderberry is more tolerant of a range of climates, while American Elderberry thrives in temperate U.S. zones, and European Elderberry is best suited for cooler European climates.
-
Uses of Different Varieties:
- Culinary: Black and American elderberries are widely used in making jams, jellies, syrups, and wines.
- Medicinal: European Elderberry has a long history in traditional herbal medicine, particularly for immune support and flu treatments.
Elderberry Varieties Comparison
| Variety Name | Taste Profile | Growth Size | Climate Preferences | Best Use |
|---|---|---|---|---|
| Black Elderberry | Slightly tart, rich | 6–12 feet tall | Wide range of climates | Culinary, medicinal |
| American Elderberry | Mild, sweet | 6–12 feet tall | Temperate U.S. zones | Culinary, syrups, wine |
| European Elderberry | Strong, bitter | 3–6 feet tall | Cooler climates | Medicinal, herbal remedies |
4. Planting Elderberry Bushes
Planting elderberry bushes properly is crucial for their healthy growth and long-term success. Understanding the best planting time, how to prepare the soil, and how to care for them right after planting will help you achieve a thriving elderberry bush in your garden.
When to Plant Elderberries:
- Best Planting Times: The ideal planting time for elderberries is during the early spring or fall. Both seasons provide cooler temperatures, allowing the roots to establish before the heat of summer or the cold of winter sets in.
-
Climate Considerations:
- In warmer climates, planting in early spring is preferred to avoid summer heat stress.
- In cooler regions, fall planting is ideal, as it allows the bushes to focus on root development before frost hits.
Step-by-Step Planting Process:
- Preparing the Soil: Elderberries prefer slightly acidic, well-draining soil. Before planting, amend the soil with compost or organic matter to improve drainage and fertility. If your soil is clay-heavy, add sand or organic mulch to improve texture and drainage.
-
Digging the Hole and Spacing:
- Dig a hole that is about twice the size of the root ball to give the roots plenty of space to grow.
- Space each elderberry bush about 6 to 8 feet apart to ensure proper airflow and avoid overcrowding.
-
How to Plant the Bushes Properly:
- Place the elderberry bush in the hole, ensuring that the top of the root ball is level with the surrounding soil.
- Fill the hole with soil, gently packing it around the roots to eliminate air pockets. Water the plant thoroughly after planting.
Mulching and Watering After Planting:
- Importance of Mulch: Apply a 2 to 3-inch layer of mulch around the base of the bush to help retain moisture, regulate soil temperature, and reduce competition from weeds.
-
Watering Techniques:
- Water the newly planted elderberry bush deeply and regularly, ensuring that the soil remains consistently moist, but not soggy. Avoid shallow watering, which can lead to weak root growth.
- Be cautious not to overwater, as this can lead to root rot. Ensure the soil has good drainage to prevent waterlogging.

5. Watering and Fertilizing Elderberry Bushes
Proper watering and fertilizing are essential for elderberry bushes to thrive and produce abundant fruit. Understanding the water requirements at each growth stage, as well as when and how to fertilize, will ensure your elderberries receive the care they need.
Watering Needs:
-
How Often to Water Elderberries:
- During the first few weeks after planting, water elderberries deeply at least once a week to establish the roots.
- Once established, elderberries require regular watering, especially during dry periods. Water deeply about once a week, ensuring the soil stays moist but not soggy.
- During the growing season, particularly in hot weather, check the soil moisture regularly, as elderberries need consistent hydration for healthy growth.
-
Signs of Overwatering and Underwatering:
- Overwatering: Yellowing leaves, root rot, or standing water around the base of the plant are signs of overwatering.
- Underwatering: Wilting leaves, dry soil, or crispy leaf edges indicate that the elderberry bush is not receiving enough water.
Fertilization:
-
When and How to Fertilize Elderberries:
- Fertilize elderberry bushes in early spring before new growth starts. Apply a balanced organic fertilizer that supports overall growth.
- During the growing season, you can apply additional fertilizer once a month to support healthy fruit development.
-
Best Organic Fertilizers for Elderberries:
- Compost, aged manure, or organic plant food are ideal for elderberries, as they release nutrients slowly and improve soil health.
- Fish emulsion or seaweed-based fertilizers can also be effective in promoting healthy growth and boosting fruit production.
-
Avoiding Over-Fertilizing:
- Over-fertilizing can result in excessive leaf growth at the expense of fruit production. Signs of over-fertilization include lush, green foliage with few or no berries.
- Always follow the recommended fertilization guidelines to avoid nutrient imbalances and ensure that the bushes focus on fruiting.
6. Pruning Elderberry Bushes
Pruning is an essential part of elderberry bush care. Proper pruning promotes healthier growth, better yields, and helps prevent diseases. In this section, we will cover why pruning is important, the best techniques, and how to properly maintain your pruning tools.
Why Pruning is Important:
-
Benefits of Pruning:
- Growth Control: Pruning helps control the size and shape of your elderberry bush, ensuring it doesn't become too large or unmanageable.
- Better Yields: Regular pruning encourages the production of more fruit by improving sunlight penetration and air circulation throughout the plant.
- Disease Prevention: By removing dead or diseased branches, pruning helps prevent the spread of infections and pests.
-
Best Time to Prune Elderberry Bushes:
- The best time to prune elderberries is in late winter to early spring, before new growth begins. This ensures that the bush can recover and put energy into healthy growth.
- Avoid pruning during the growing season, as it may stress the plant and affect fruiting.
Pruning Techniques:
-
Removing Dead or Diseased Wood:
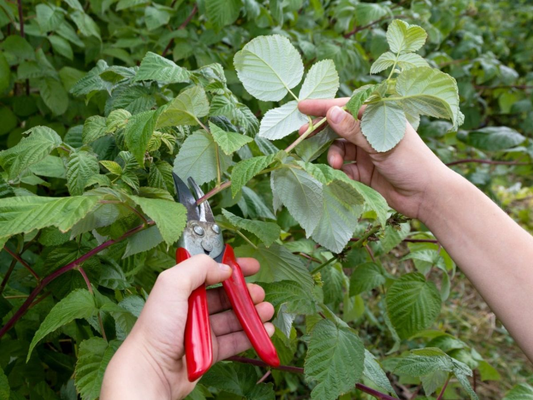
- Start by cutting away any dead, damaged, or diseased branches to prevent the spread of disease and pests.
- Make clean cuts just above the nodes to encourage healthy new growth.
-
Shaping the Bush for Better Air Circulation:
- Remove any branches that are growing inward or crossing each other, as this can impede airflow and cause congestion.
- Focus on creating an open structure that allows sunlight to reach the center of the bush for better fruit production.
-
Managing Growth for Maximum Fruit Production:
- Remove some of the older wood (around 1/3 of the bush) to encourage new shoots, which will produce more fruit in the coming season.
- Keep a balanced structure with strong, healthy canes that will support fruiting and avoid excessive crowding.
Tools for Pruning:
-
Recommended Tools for Effective and Safe Pruning:
- Use sharp pruning shears or bypass pruners for smaller branches.
- For larger branches, consider using pruning saws or loppers to make clean cuts without damaging the plant.
-
Sanitizing Your Pruning Tools:
- To prevent the spread of diseases, sanitize your pruning tools before and after each use by wiping them down with rubbing alcohol or a diluted bleach solution (1 part bleach to 9 parts water).
- Ensure that your tools are dry before using them again on another plant to avoid transferring pathogens.
7. Protecting Elderberry Bushes from Pests and Diseases
Elderberry bushes are generally resilient but can still fall prey to various pests and diseases. Proper care and prevention strategies will help keep your plants healthy and productive. In this section, we’ll explore common pests, diseases, and how to protect your elderberries naturally.
Common Pests:
-
Aphids:
- Aphids are small, soft-bodied insects that feed on the sap of elderberries, causing leaves to curl and distort.
- Management: Spray the affected areas with a mixture of water and mild soap, or use neem oil for an organic solution. Encourage beneficial insects like ladybugs that feed on aphids.
-
Spider Mites:
- Spider mites are tiny pests that can cause yellowing of leaves and webbing. They thrive in hot, dry conditions.
- Management: Regularly spray elderberries with water to reduce spider mite populations, or apply insecticidal soap or neem oil for effective control.
-
Elderberry Borers:
- Elderberry borers are larvae that tunnel into the branches of elderberries, causing dieback and weakening the plant.
- Management: Prune affected branches immediately, removing and disposing of infested wood. Use insecticidal soaps or sprays if needed.
Common Diseases:
-
Elderberry Rust:
- Elderberry rust causes yellow-orange spots on leaves and can defoliate the plant if left untreated.
- Preventive Measures: Remove and dispose of infected leaves and avoid overhead watering to reduce moisture on leaves.
-
Powdery Mildew:
- This fungal disease appears as white, powdery spots on the leaves and stems of elderberry bushes.
- Treatment: Use organic fungicides like sulfur or neem oil to treat affected plants, and improve air circulation around the bush to prevent further outbreaks.
-
Anthracnose:
- Anthracnose causes dark spots on leaves and stems, which can lead to early leaf drop.
- Prevention: Remove and destroy infected plant parts. Apply fungicides in early spring as a preventive measure.
Integrated Pest Management (IPM):
-
Balanced Ecosystem:
- Create a healthy garden ecosystem by introducing natural predators like ladybugs, lacewings, and predatory beetles, which help control pest populations.
- Encourage biodiversity by planting a variety of plants that attract beneficial insects and deter harmful pests.
-
Companion Plants:
- Planting herbs like basil, mint, and oregano near elderberries can help deter pests. Strong-scented plants like garlic and chives are also known to repel aphids and other common pests.
- Consider planting marigolds, which attract beneficial insects while repelling harmful ones, around elderberry bushes to create a pest-friendly environment.

8. Harvesting Elderberries
Harvesting elderberries at the right time is essential for ensuring the best flavor and nutritional value. In this section, we’ll discuss how to identify when elderberries are ripe, how to harvest them safely, and tips for preserving and using the fruit.
When to Harvest:
-
Timing the Harvest for Peak Ripeness:
- Elderberries are typically ready to harvest in late summer to early fall, depending on the variety and climate.
- Harvest when the clusters are fully ripe, which is when the berries turn a deep purple or black color. Avoid harvesting unripe, red berries, as they can be toxic if consumed.
-
Signs of Ripe Elderberries:
- The berries should be fully developed and darkened in color.
- Ripe elderberries will easily come off the stem when gently tugged, and the berries will appear plump and shiny.
How to Harvest:
-
Techniques for Safely Harvesting Elderberry Clusters:
- Use sharp garden shears or pruning scissors to cut the entire cluster of berries from the bush.
- Cut close to the main stem, leaving as much of the berry cluster intact as possible to avoid bruising or damaging the fruit.
-
Best Practices to Avoid Damaging the Bush During Harvesting:
- Work gently and avoid pulling or yanking at the clusters, as this can harm the plant and reduce future yields.
- Make sure to only remove the fully ripe clusters, leaving unripe ones on the bush to mature.
Post-Harvest Care:
-
Storing and Preserving Harvested Elderberries:
- Fresh elderberries can be stored in the refrigerator for up to a week. For longer storage, freeze them on a baking sheet before transferring them to a container or freezer bag.
- For preserving elderberries for later use, consider making elderberry syrup, jam, or wine.
-
How to Use Elderberries:
- Culinary Uses: Elderberries are commonly used in jams, jellies, pies, and syrups. They can also be used to flavor beverages like wine and tea.
- Medicinal Uses: Elderberries have been traditionally used to support immune health, especially for colds and flu. Elderberry extract or syrup can be consumed as a natural remedy.
9. Winter Care for Elderberry Bushes
Winter care is essential for ensuring that your elderberry bushes thrive year after year. Proper winterization and preparing your plants for the cold months can protect them from frost and help them bounce back in spring. In this section, we’ll discuss how to winterize elderberries and how to handle any signs of winter stress.
Winterizing Elderberries:
-
Protecting Elderberry Bushes in Colder Climates:
- In colder climates, elderberry bushes may need extra protection from freezing temperatures. Mulch around the base of the plant with a thick layer (3–4 inches) of straw, leaves, or wood chips to insulate the roots and retain moisture.
- For more severe winters, consider covering the bushes with burlap or frost cloth to shield them from freezing winds and heavy snow.
-
Pruning and Preparing for Winter Dormancy:
- Prune back any dead or damaged wood in late fall before the first frost. This will encourage healthy growth in the spring and prevent the spread of disease.
- Ensure that the bush is not overcrowded by thinning the branches, which can help with air circulation and prevent moisture buildup that could lead to fungal issues.
Signs of Winter Stress:
-
How to Spot Damage from Frost or Cold Stress:
- Look for signs of damage such as browned or blackened branches, brittle wood, or leaf scorch on new growth in the spring.
- If the stems feel brittle and break easily, it may be a sign of winter damage.
-
Tips for Revitalizing Elderberry Bushes in the Spring:
- In early spring, remove any frost-damaged branches and lightly prune to encourage fresh growth.
- Give the bush a boost with a balanced organic fertilizer and ensure it is watered properly to promote strong new growth.
10. Troubleshooting Common Elderberry Care Issues
Even with the best care, elderberry bushes may experience some common issues that can affect their growth and productivity. In this section, we’ll cover solutions for addressing leaf discoloration, poor growth, and signs of disease.
Leaf Yellowing or Browning:
-
Causes of Leaf Discoloration and How to Fix It:
- Yellowing leaves can indicate a nitrogen deficiency or poor soil drainage. Test the soil and amend with compost or organic fertilizers to correct nutrient imbalances.
- Browning at the edges or tips of leaves may be caused by underwatering or excessive heat. Ensure the plant is receiving enough water, especially during dry spells.
-
Nutrient Deficiencies or Pest Problems:
- Pests like aphids or spider mites can cause leaf damage. Regularly inspect the bushes and treat infestations with organic insecticides or neem oil.
- Consider conducting a soil test to determine if specific nutrients, such as potassium or magnesium, are lacking, and amend accordingly.
Poor Growth and Lack of Fruit:
-
Factors Affecting Fruit Production:
- Poor growth and lack of fruit may be caused by insufficient sunlight or overcrowding. Ensure your elderberries have enough space and receive at least 6 hours of sunlight daily.
- Improper pruning or too much nitrogen fertilizer can also hinder fruiting. Prune properly and apply balanced fertilizers.
-
How to Promote Better Growth and Higher Yields:
- Provide adequate watering during dry periods and ensure the soil is well-draining.
- Plant at least two elderberry bushes for cross-pollination to increase fruit yield.
Diseased or Damaged Bushes:
-
Signs of a Diseased Elderberry Bush and How to Treat It:
- Signs of disease include wilting, discolored leaves, and stunted growth. Common diseases include powdery mildew and elderberry rust.
- Remove any affected leaves and branches. Apply fungicides as necessary, and use organic treatments like neem oil for fungal issues.

11. Frequently Asked Questions (FAQ)
Below are answers to some of the most frequently asked questions about elderberry bushes. Whether you are a beginner or an experienced gardener, these tips will help you care for your elderberry bushes and enjoy their health benefits.
-
1. Are elderberry bushes easy to grow?
- Yes, elderberry bushes are relatively easy to grow. They thrive in a variety of soil types and can tolerate a wide range of conditions. However, they do need adequate sunlight and water to produce healthy fruit.
-
2. How do I know if my elderberry bush is getting enough sunlight?
- Elderberry bushes need at least 6 hours of sunlight daily for optimal growth and fruit production. If the leaves turn yellow or growth is sparse, it may be a sign that the bush is not getting enough light.
-
3. Can elderberries be grown in pots or containers?
- Yes, elderberries can be grown in pots or containers, especially if you have limited space. Just make sure the container is large enough to allow for proper root growth and ensure it has drainage holes.
-
4. How do I prune elderberry bushes to encourage better fruit production?
- Prune elderberry bushes in late winter or early spring by removing dead or diseased wood. This helps improve airflow and directs energy towards healthy growth. Thin out overcrowded areas to encourage more fruit-bearing stems.
-
5. What are the health benefits of elderberries?
- Elderberries are packed with antioxidants and vitamin C, making them beneficial for immune support, fighting off colds, and reducing inflammation. They are also used in syrups and teas for their medicinal properties.
-
6. Can I use elderberry flowers or only the berries?
- Both elderberry flowers and berries are usable. The flowers are often used to make elderflower tea, syrups, or infusions, while the berries are typically used in jams, juices, and health supplements.
-
7. How long does it take for an elderberry bush to produce fruit?
- It typically takes 2-3 years for an elderberry bush to produce fruit after planting, although some bushes may start bearing fruit in the first year if grown from a mature cutting or in ideal conditions.
-
8. How can I prevent birds from eating my elderberries before I can harvest them?
- To protect your elderberries from birds, consider using netting or mesh around the bushes. Alternatively, you can also try hanging shiny objects or using scarecrows to deter the birds.


