How to Grow Strawberries from Seeds
Share
- 1. Introduction
- 2. Understanding Strawberry Varieties
- 3. Choosing the Right Strawberry Seeds
- 4. Preparing for Planting Strawberries from Seeds
- 5. Planting Strawberry Seeds
- 6. Germination Process
- 7. Transplanting Seedlings
- 8. Growing Strawberry Plants in Containers vs. Ground
- 9. Caring for Strawberry Plants
- 10. Harvesting Strawberries
- 11. Common Problems and Troubleshooting
- 12. Frequently Asked Questions (FAQ)
1. Introduction
Growing strawberries from seeds can be one of the most rewarding gardening challenges you can take on. While it requires patience and dedication, the process of nurturing a small seed into a full-grown strawberry plant offers a sense of accomplishment like no other. Whether you are an experienced gardener or a novice, starting strawberries from seeds allows you to explore the entire growth cycle and gain a deeper understanding of how these delicious fruits grow.
Here are a few reasons why growing strawberries from seeds is a rewarding challenge:
- Cost-Effective: Starting from seeds is more affordable than purchasing fully grown plants.
- Variety Selection: Growing from seeds gives you access to unique and heirloom strawberry varieties that may not be available as seedlings.
- Gardener's Satisfaction: There’s a deep sense of satisfaction in watching your seeds sprout, grow, and eventually bear fruit.
- Better Control: You have more control over the growing process, including soil conditions, spacing, and care techniques.
- Long-Term Investment: Strawberry plants can live for several years, meaning that with good care, you could enjoy fruit year after year.
While it may take a little extra effort and time compared to buying established plants, growing strawberries from seeds is an exciting and fulfilling project for gardeners of all levels. It is an investment that pays off not just in the form of fresh, delicious strawberries but also in the joy of growing your own food.

2. Understanding Strawberry Varieties
When it comes to growing strawberries from seeds, understanding the different varieties is crucial to success. Strawberries come in several types, each with unique growth patterns, fruiting times, and care needs. The three primary strawberry varieties are:
- June-bearing: These strawberries produce a large crop in late spring or early summer, typically over a 2–3 week period. They are the most common variety grown in gardens and are great for those who want a bountiful harvest all at once.
- Everbearing: Everbearing strawberries produce smaller harvests multiple times throughout the growing season—once in spring, again in summer, and sometimes even in fall. These plants are perfect for gardeners looking for continuous fruiting.
- Day-neutral: Day-neutral varieties bear fruit continuously, regardless of the length of daylight. These strawberries are perfect for gardeners who want to harvest throughout the entire growing season.
Each of these varieties has distinct advantages and is suited for different growing conditions. However, not all types are equally well-suited for propagation from seed. Here’s a breakdown of which varieties are best for growing from seeds:
- June-bearing: These varieties are the most commonly grown from seed. They tend to produce larger plants and have higher fruit yields, making them a favorite for those starting strawberries from seed.
- Everbearing: Everbearing strawberries can also be grown from seed, though they may be more difficult to start compared to June-bearing varieties due to their need for more specific conditions and care.
- Day-neutral: Day-neutral strawberries are often easier to grow from seed, and their continuous fruiting nature can be a great reward for the effort invested in germination and plant care.
Understanding which variety works best for your garden is essential for ensuring a successful strawberry crop. Below is a table comparing the pros and cons of each variety for seed growth:
| Strawberry Variety | Pros | Cons |
|---|---|---|
| June-bearing | High yield, great for large harvests, well-suited for most climates | Shorter harvest period, requires more care during the growing season |
| Everbearing | Multiple harvests throughout the season, ideal for extended enjoyment | Can be harder to grow from seed, more care required for successful germination |
| Day-neutral | Continuous fruiting, easy to grow from seed, great for small spaces | Smaller yields compared to June-bearing varieties, requires consistent care |
3. Choosing the Right Strawberry Seeds
Choosing the right strawberry seeds is crucial to ensuring a successful growing experience. Not all strawberry seeds are created equal, so it's important to buy from trusted suppliers and carefully evaluate the seed packets. Here are some essential tips to consider when selecting your strawberry seeds:
- Buy from Trusted Suppliers: Purchase seeds from reputable nurseries or garden centers with good reviews. Trusted suppliers are more likely to offer high-quality seeds that are free from contaminants and disease.
- Check for Freshness: Always check the expiration date or packaging date on the seed packet. Fresh seeds have a higher chance of successful germination compared to older seeds, which may have lower viability.
- Look for Certified Organic Seeds: If you're growing strawberries without the use of pesticides or synthetic fertilizers, consider purchasing certified organic strawberry seeds. These seeds are grown without harmful chemicals, ensuring healthier plants.
- Consider Variety and Growth Habit: Select the appropriate variety based on your climate and growing conditions (e.g., June-bearing, everbearing, or day-neutral). Ensure the variety suits your gardening goals—whether you're looking for early harvests, continuous fruiting, or high yields.
Additionally, here are some characteristics to look for in strawberry seed packets:
- Seed Germination Rate: Look for packets that specify the expected germination rate. Higher rates indicate better seed quality.
- Planting Instructions: Reliable seed packets provide clear instructions on sowing depth, spacing, and recommended growing conditions.
- Hardiness Zone: Ensure that the seeds are suitable for your region's climate. This is particularly important for outdoor planting in colder climates.
4. Preparing for Planting Strawberries from Seeds
Successfully planting strawberries from seeds requires careful preparation, including timing, creating the right environment, and gathering the necessary supplies. Here’s how to get ready for planting your strawberry seeds:
- Importance of Timing: Timing is crucial when planting strawberries from seeds. The best time to start strawberry seeds is early spring, around 8–10 weeks before the last expected frost. This gives your seeds enough time to germinate and establish strong seedlings before they are ready for transplanting outdoors.
-
Ideal Growing Environment: Strawberry seeds need a specific set of environmental conditions to thrive:
- Light: Strawberry seeds need ample light to germinate. Place seed trays in a sunny location or use grow lights to provide 12–16 hours of light per day.
- Temperature: The ideal temperature for strawberry seed germination is between 65°F to 75°F (18°C to 24°C). Keep the room warm but avoid placing seeds in direct heat or drafts.
- Humidity: Strawberries require high humidity for successful germination. You can create a mini greenhouse effect by covering the seed trays with plastic wrap or a humidity dome to maintain moisture levels.
-
Supplies Needed: To prepare for planting, gather the necessary supplies:
- Seed Trays: Use shallow seed trays or small containers with good drainage to sow the seeds.
- Good-Quality Soil: A well-draining, light seed-starting mix is ideal for strawberries. Avoid heavy garden soil that can compact and inhibit root growth.
- Containers: If you don’t have a tray, individual containers such as small pots or seedling trays can be used to start your seeds.
- Watering Can/Spray Bottle: Keep the soil moist with gentle watering. A spray bottle helps avoid disturbing the tiny seeds while keeping the soil evenly moist.

5. Planting Strawberry Seeds
Planting strawberry seeds requires attention to detail to ensure successful germination and strong seedling growth. Follow these step-by-step instructions to plant your strawberry seeds effectively:
-
Step 1: Prepare the Seed Trays or Containers:
- Fill your seed trays or small containers with a light, well-draining seed-starting mix. Avoid using heavy soil, as it can impede seedling growth.
- Ensure the containers have drainage holes to prevent waterlogging and root rot.
-
Step 2: Sowing the Seeds:
- Lightly scatter the strawberry seeds over the surface of the soil. Strawberry seeds are very small, so be careful not to overcrowd them.
- Do not bury the seeds too deep—just lightly press them into the surface of the soil using a flat tool, like a piece of cardboard or a small board. Strawberry seeds need light to germinate.
-
Step 3: Spacing and Depth:
- For proper spacing, aim to plant seeds about 1/2 inch apart, ensuring that they have enough room to develop without overcrowding.
- As mentioned, strawberry seeds should not be buried—just press them gently into the soil surface. The ideal depth is about 1/8 inch (3mm).
-
Step 4: Watering:
- After sowing, gently water the seeds using a spray bottle or fine mist to avoid disturbing the seeds. Keep the soil evenly moist, but not soaking wet.
-
Step 5: Providing Ideal Conditions:
- Place the seed trays in a location with temperatures between 65°F and 75°F (18°C - 24°C) for optimal germination. Ensure they receive 12–16 hours of light daily, either from a sunny window or grow lights.
- Maintain high humidity by covering the seed tray with a plastic dome or plastic wrap. This will help keep moisture levels up.
-
Step 6: Stratification (Optional but Recommended):
- If you're planting strawberry seeds that require cold stratification, place the seed trays in the refrigerator for 2–4 weeks before sowing. This simulates winter conditions and helps break the seed's dormancy, encouraging sprouting.
- After the stratification period, remove the seeds from the fridge, let them warm up, and then follow the steps above for sowing and germination.
6. Germination Process
The germination process is an exciting and crucial stage in growing strawberries from seeds. During this time, you'll see the tiny seeds begin to sprout into seedlings. Here's what to expect and how to care for them:
-
What to Expect During Germination:
- After sowing, it can take anywhere from 7 to 21 days for strawberry seeds to germinate, depending on the variety, temperature, and conditions.
- You may first notice small white or green shoots emerging from the soil, indicating the seeds are sprouting.
- Strawberry seeds are slow to germinate, so patience is key during this phase.
-
Average Time for Seed Sprouting:
- Typically, you can expect strawberry seeds to sprout within 1-2 weeks after sowing. However, some varieties may take longer, especially if they haven't undergone proper stratification.
- During this period, it's important to monitor the seeds regularly for any signs of mold, uneven moisture levels, or lack of sprouting.
-
How to Monitor and Care for the Seeds:
- Check the seed trays daily for any signs of sprouting and to ensure the soil remains moist but not waterlogged.
- If the soil starts to dry out, lightly mist it with water using a spray bottle to maintain the necessary moisture level.
- Once sprouts begin to emerge, you can remove the plastic cover or humidity dome to allow for better air circulation and reduce the risk of mold.
-
Light Requirements During Germination:
- Strawberry seeds need plenty of light during the germination phase. Ensure they receive 12–16 hours of light each day, either from natural sunlight or grow lights.
- If using artificial lighting, place the lights about 2-4 inches above the seedlings to ensure they receive enough light without being too far away.

7. Transplanting Seedlings
Transplanting your strawberry seedlings into larger containers or outdoor gardens is a crucial step in their development. With proper care and preparation, you can ensure a smooth transition for your seedlings. Here’s a guide to successfully transplanting strawberry seedlings:
-
When and How to Transplant Seedlings:
- Wait until the seedlings are strong enough to handle transplanting. This usually occurs after 4-6 weeks when the seedlings have several true leaves and are large enough to handle gently.
- Transplant your seedlings into larger containers or into the garden after the last frost date has passed, ensuring the outdoor temperatures are consistently above 60°F (15°C).
- If transplanting into containers, choose a large pot or container (at least 8-12 inches deep) to allow enough space for root growth.
-
Preparing Soil for Transplanting:
- For outdoor planting, prepare the soil by choosing a sunny spot with well-draining, fertile soil. Strawberries thrive in slightly acidic soil with a pH of 5.5 to 6.5.
- Amend the soil with compost or organic matter to improve drainage and fertility. If planting in containers, use a high-quality, well-draining potting mix.
- Make sure the planting site receives at least 6-8 hours of direct sunlight each day to promote healthy growth.
-
How to Harden Off Seedlings:
- Before moving your seedlings outdoors, harden them off to acclimate them to outdoor conditions. Begin by placing the seedlings outside for a few hours each day, gradually increasing the exposure to sunlight and wind over the course of 7-10 days.
- This process helps the seedlings adjust to the harsher outdoor environment and reduces the risk of shock once they are transplanted into the garden.
-
Troubleshooting Transplant Shock:
- Transplant shock can occur when seedlings struggle to adjust to their new environment. To minimize shock, water the seedlings thoroughly before and after transplanting to help them settle into the soil.
- If seedlings show signs of stress (wilting, yellowing leaves), make sure they are not exposed to direct sunlight immediately after transplanting and provide consistent moisture until they recover.
- Give the seedlings a few weeks to establish themselves, and avoid fertilizing until you see new growth to prevent burning the delicate roots.
8. Growing Strawberry Plants in Containers vs. Ground
Whether you choose to grow strawberries in containers or directly in the ground depends on several factors such as space, soil quality, and climate. Both methods have their advantages and challenges. Here's a detailed comparison to help you make the best choice for your garden:
-
Pros and Cons of Container Growing vs. Planting in the Ground:
-
Container Growing:
- Pros:
- Perfect for small spaces like balconies, patios, or decks.
- Easy to control soil conditions and drainage.
- Can be moved to optimize sunlight exposure or protect from extreme weather.
- Cons:
- Requires frequent watering due to faster soil drying in containers.
- Limited space for root growth can restrict plant size and fruit yield.
- May need more attention to avoid pests like aphids or snails that can infest containers.
- Pros:
-
Planting in the Ground:
- Pros:
- More space for roots to grow, leading to larger plants and potentially higher yields.
- Less frequent watering required, as ground soil retains moisture better than containers.
- Plants are generally hardier, benefiting from natural ground conditions and surrounding ecosystem.
- Cons:
- Requires a suitable garden space with good soil quality and drainage.
- Plants are more vulnerable to pests and diseases like root rot or fungal infections.
- Less flexibility in terms of mobility and optimizing sunlight exposure.
- Pros:
-
Tips for Growing in Pots: Choosing the Right Container and Soil Mix:
- Choose a container that is at least 8-12 inches deep with drainage holes to ensure proper root development and water flow.
- Use a well-draining potting mix, such as a mix made for strawberries or vegetables, to prevent root rot.
- Consider using hanging baskets or vertical planters if space is limited. These containers are ideal for saving space while providing excellent drainage.
-
How to Care for Strawberries Planted in Both Containers and In-Ground:
- Watering: Ensure consistent moisture levels. Container-grown strawberries need more frequent watering than those planted in the ground. Water them whenever the soil feels dry to the touch.
- Fertilizing: Use a balanced fertilizer to promote healthy growth. Container plants may need more regular feeding since nutrients wash out with watering, while ground plants can often rely on the soil's natural fertility.
- Pest Control: Check for common strawberry pests like aphids, slugs, and spider mites. Containers can be more easily monitored and treated for pests, but in-ground plants may require more attention due to a larger area.
-
Container Growing:

9. Caring for Strawberry Plants
Caring for strawberry plants involves providing consistent attention to their basic needs, such as watering, fertilizing, and maintaining healthy soil. Regular care ensures healthy, productive plants that yield sweet strawberries throughout the growing season. Here's how you can maintain optimal care for your strawberry plants:
-
Ongoing Care Requirements:
-
Watering:
- Strawberry plants need consistent moisture, especially during the flowering and fruiting stages. Water them regularly to keep the soil moist but not soggy.
- Water the plants early in the morning to reduce the risk of fungal infections and allow the foliage to dry by evening.
-
Fertilizing:
- Use a balanced fertilizer designed for strawberries or general-purpose plants. Fertilize in early spring when the plants start growing and again after the harvest season to support healthy growth.
- Avoid over-fertilizing, as this can lead to excessive foliage growth with fewer fruits.
-
Maintaining Healthy Soil:
- Ensure that the soil is well-draining and nutrient-rich. If growing in containers, replace the potting mix every couple of years to keep the soil fertile.
- In the ground, amend the soil with compost or organic matter to improve soil structure and nutrient content.
-
Watering:
-
How to Prune Strawberry Plants for Better Yields:
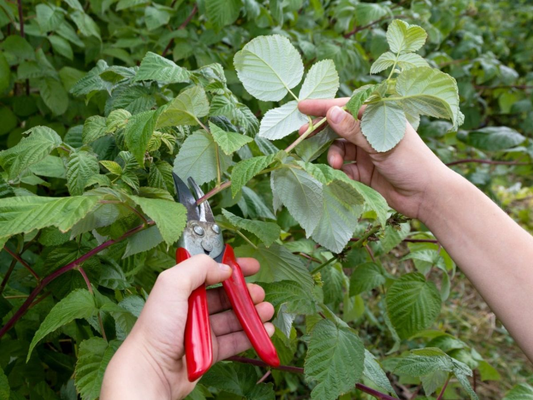
- Pruning helps encourage better fruit production by focusing the plant’s energy on producing strawberries rather than excessive leaves or runners.
- Remove dead or damaged leaves throughout the growing season to improve airflow and prevent disease.
- After the harvest season, trim back any old leaves and runners to keep the plants tidy and promote new growth.
-
Importance of Mulching and Preventing Disease:
-
Mulching:
- Apply a layer of organic mulch (straw, wood chips, or compost) around the base of your strawberry plants to retain moisture, regulate soil temperature, and suppress weeds.
- Mulch also helps keep the fruit off the soil, reducing the risk of rot and pests.
-
Preventing Disease:
- Keep an eye out for common strawberry diseases such as powdery mildew, gray mold, and rust. Remove any infected leaves or fruit immediately.
- Space plants appropriately to allow for proper air circulation and reduce the risk of fungal infections.
- Rotate strawberry plant locations every few years to prevent soil-borne diseases.
-
Mulching:
10. Harvesting Strawberries
Harvesting strawberries at the right time ensures you get the best flavor and quality. Knowing when to pick them and how to handle them during the harvesting process is key to a successful strawberry season. Here’s how to determine when strawberries are ready to harvest and how to collect them without damaging the plants:
-
How to Determine When Strawberries Are Ready to Harvest:
- Strawberries are ready to harvest when they have reached full color (red for most varieties, but some may be yellow or white when ripe).
- The berries should be firm, shiny, and slightly soft to the touch. Overripe strawberries may become mushy or start to rot.
- Check the plant daily during the peak growing season, as strawberries ripen quickly.
-
Step-by-Step Guide to Harvesting Strawberries Without Damaging the Plant:
- Use scissors or garden shears to cut the strawberry stem, leaving about an inch of the stem attached to the fruit. Avoid pulling the berries directly from the plant, as this can damage both the fruit and the plant.
- Harvest berries early in the morning when the fruit is cool, as this prevents wilting and extends shelf life.
- Handle the fruit gently to avoid bruising or squashing the berries during collection.
-
Post-Harvest Care:
- Store freshly harvested strawberries in a cool, dry place. Refrigeration helps preserve their freshness, but avoid washing the berries until you’re ready to eat them.
- To extend the shelf life, freeze any extra strawberries by placing them on a baking sheet to freeze individually before transferring them to an airtight container or bag.
11. Common Problems and Troubleshooting
Despite their resilience, strawberry plants can face several common challenges that may affect their growth and fruit production. Understanding these issues and knowing how to troubleshoot them is essential for a healthy strawberry crop. Here’s an overview of common problems and how to deal with them:
-
Common Challenges:
- Pests: Common pests include aphids, spider mites, slugs, and the strawberry root weevil. These pests can damage both the leaves and fruit.
- Diseases: Strawberry plants are susceptible to diseases such as powdery mildew, gray mold, verticillium wilt, and rust, which can cause leaf discoloration, mold growth, and poor fruit development.
- Poor Fruit Production: This can happen due to factors like inadequate pollination, improper watering, or lack of sunlight.
-
Solutions for Common Issues:
- Wilting and Yellowing Leaves: This could be a sign of overwatering or a nutrient deficiency. Ensure your plants have well-drained soil and consider using a balanced fertilizer. If the soil is too compact, consider aerating it to improve water retention.
- Slow Growth: Slow growth can be caused by poor soil quality or insufficient sunlight. Make sure your plants receive at least 6-8 hours of direct sunlight per day and enrich the soil with organic matter to improve fertility.
- Poor Fruit Production: If your strawberry plants aren’t producing fruit, check for proper pollination. You can introduce bees or hand-pollinate the flowers to improve fruit set. Additionally, ensure your plants are not overcrowded and have access to enough nutrients and water.
-
Organic Ways to Deal with Pests and Diseases:
- Neem Oil: An organic solution to control pests like aphids, spider mites, and whiteflies. Dilute neem oil with water and spray on affected plants.
- Insecticidal Soap: This can be used to combat common pests such as aphids and caterpillars.
- Beneficial Insects: Introduce natural predators such as ladybugs and predatory mites to control aphids and other harmful insects.
- Companion Planting: Grow plants like garlic or marigolds nearby to deter pests and prevent fungal diseases.

12. Frequently Asked Questions (FAQ)
-
How long does it take for strawberry seeds to grow?
It typically takes 1-2 weeks for strawberry seeds to germinate. However, depending on the variety and environmental conditions, it may take up to 3 weeks for the seeds to sprout. After germination, seedlings will need several more weeks to develop strong enough roots for transplanting.
-
Can I grow strawberries from seeds indoors?
Yes, strawberries can be grown from seeds indoors, provided you offer the right conditions such as adequate lighting, temperature (around 60-70°F or 15-21°C), and humidity. Indoor growing also allows you to control the environment and start the seeds early in the season before moving them outdoors.
-
Do I need to cross-pollinate strawberries?
Most strawberry varieties are self-pollinating, meaning they do not require cross-pollination to produce fruit. However, cross-pollination can sometimes increase fruit yield. Bees and other pollinators help with natural pollination, so it's beneficial to plant strawberries in areas that attract pollinators.
-
How do I know if my strawberry seeds are viable?
You can test seed viability by performing a simple germination test. Place a few seeds on a moist paper towel, fold it, and place it in a warm location. If most of the seeds germinate within a few weeks, the seeds are viable. You can also check the seed packet for the expected germination rate.
-
Can I grow strawberries from seeds in all climates?
Strawberries can be grown in most climates, but they prefer temperate climates. Some varieties, like day-neutral strawberries, are more adaptable to different climates. For warmer or cooler regions, choose the appropriate variety and consider growing them in containers to better manage temperature conditions.


