How to Propagate Plants: Tips and Tricks for Every Gardener
Share
Table of Contents
1. Introduction
Plant propagation is the process of creating new plants from existing ones. This essential practice is not only vital for maintaining plant diversity but also for expanding personal gardens and collections. Whether you're a seasoned gardener or a novice, understanding the basics of propagation can enhance your gardening experience.
The importance of plant propagation includes:
-
Cost-Effective:
- Grow new plants without purchasing them.
- Save money on replacing lost or damaged plants.
-
Increases Plant Collection:
- Expand your garden with different varieties.
- Share propagated plants with friends and family.
-
Preservation of Plant Species:
- Help conserve rare or endangered plants.
- Encourage biodiversity in your garden.
-
Customization:
- Tailor your garden layout with specific plants.
- Experiment with different propagation methods.
In this article, we will explore various tips and tricks for successfully propagating plants, from the essential tools and materials needed to the best techniques for different plant types. Whether you aim to grow more of your favorite flowers or create an entire vegetable garden, you'll find valuable insights to guide you through the propagation process.

2. Understanding Plant Propagation
Plant propagation is the process of creating new plants from a variety of sources, including seeds, cuttings, and other plant parts. It is a fundamental practice in gardening and horticulture, enabling gardeners to grow new plants, preserve species, and maintain plant diversity. Understanding the different methods of propagation can significantly enhance your gardening experience.
2.1 Definition of Plant Propagation
Plant propagation involves the reproduction of plants through various methods. The goal is to produce new, genetically similar plants from existing ones. This process can be accomplished using two primary types of propagation:
2.2 Different Types of Propagation
-
Sexual Propagation:
- Involves the use of seeds to grow new plants.
- Requires pollination, fertilization, and seed development.
- Results in genetic variation, which can lead to stronger plants.
-
Asexual Propagation:
- Involves creating new plants from existing plant parts (cuttings, divisions, etc.).
- Produces clones of the parent plant, ensuring consistency in traits.
- Faster than sexual propagation, often yielding quicker results.
2.3 Importance of Understanding Plant Biology
A solid understanding of plant biology is crucial for successful propagation. Key reasons include:
-
Growth Conditions:
- Knowing the specific light, water, and temperature requirements of different plants.
- Understanding how environmental factors affect rooting and growth.
-
Hormonal Responses:
- Recognizing the role of plant hormones in growth and development.
- Using rooting hormones effectively to enhance success rates in cuttings.
-
Health and Disease Resistance:
- Identifying healthy parent plants to ensure robust new growth.
- Understanding how diseases can spread during propagation and how to mitigate risks.
By grasping these concepts, gardeners can make informed decisions and optimize their propagation efforts, ultimately leading to a thriving garden filled with healthy, vibrant plants.

3. Tools and Materials Needed
Successful plant propagation requires the right tools and materials. Having the proper equipment can make the process easier and increase your chances of success. Below is a list of essential tools and recommended materials for effective propagation.
3.1 Essential Tools
-
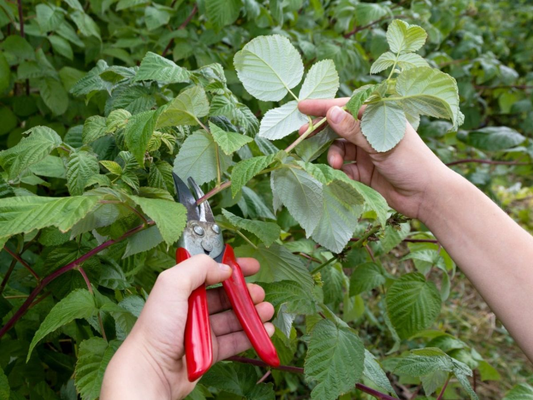
Pruning Shears:
- Used for taking cuttings from parent plants.
- Ensure they are sharp and clean to prevent damage and disease.
-
Pots:
- Choose pots with drainage holes to prevent waterlogging.
- Size should be appropriate for the type of cutting or division.
-
Soil:
- Use a well-draining potting mix or seed-starting mix.
- Consider pre-moistened soil for cuttings to reduce transplant shock.
-
Water:
- Essential for keeping cuttings hydrated.
- Use distilled or rainwater if possible, as it’s free from chemicals.
3.2 Recommended Materials
-
Rooting Hormone:
- Enhances root development in cuttings.
- Available in powder, gel, or liquid forms.
-
Plastic Bags:
- Useful for creating a humid environment for cuttings.
- Help retain moisture and encourage root growth.
3.3 Tips for Selecting the Right Tools
When choosing tools and materials, consider the following:
-
Propagation Method:
- Different methods require specific tools (e.g., shears for cuttings, pots for divisions).
- Research the best practices for the method you plan to use.
-
Quality:
- Invest in high-quality tools for longevity and effectiveness.
- Regularly maintain and clean your tools to ensure their performance.
-
Budget:
- Start with essential tools and gradually expand your collection.
- Look for sales or second-hand options for budget-friendly purchases.
With the right tools and materials at your disposal, you’ll be well-equipped to embark on your plant propagation journey.
4. Common Propagation Methods
4.1. Cuttings
Cuttings are one of the most popular and straightforward methods of plant propagation. This technique involves taking a part of a plant (usually a stem, leaf, or root) and encouraging it to grow roots to form a new plant.
-
Stem Cuttings:
- Cut a section of a healthy stem, ideally with several leaf nodes.
- Remove lower leaves to prevent rot when placed in soil.
-
Leaf Cuttings:
- Take a healthy leaf from the plant and cut it into sections, ensuring each piece has a vein.
- Place the leaf sections flat on soil or insert them into the soil.
-
Root Cuttings:
- Dig up a healthy plant and cut sections of its roots.
- Replant the root sections horizontally in soil.
Steps to Take Cuttings:
- Select a healthy parent plant.
- Use clean, sharp pruning shears to make your cut.
- Prepare the cuttings by removing excess leaves.
- Dip cuttings in rooting hormone (optional).
- Plant the cuttings in moist soil and cover them with a plastic bag or dome to retain humidity.
- Keep the soil moist and place the cuttings in indirect light until roots develop.
4.2. Division
Division is a method of propagation where a plant is split into multiple sections, each capable of growing into a new plant. This technique is commonly used for perennials and is best done during their active growth phase in spring or fall.
When to Divide Perennials:
- Spring or fall, during the plant's active growth phase.
- When the plant appears crowded or has decreased blooming.
Best Plants for Division Propagation:
- Daylilies
- Hostas
- Ferns
- Peonies
- Black-eyed Susans
Steps for Dividing Perennials:
- Water the plant a day before division to reduce stress.
- Carefully dig up the plant, ensuring you get as much root as possible.
- Use a sharp spade or knife to divide the root ball into sections.
- Replant each section in prepared soil, ensuring proper spacing.
- Water the newly divided plants thoroughly.
4.3. Layering
Layering is a propagation method where roots form on a stem while it is still attached to the parent plant. This technique can be done in two primary ways: air layering and ground layering.
-
Air Layering:
- Choose a healthy branch and make a shallow cut about one-third through the stem.
- Wrap the cut area with moist sphagnum moss and cover it with plastic wrap to retain moisture.
- After several weeks, roots should develop; cut below the roots and pot the new plant.
-
Ground Layering:
- Select a low-growing branch and bend it to the ground.
- Make a small cut or scrape on the underside and bury it in the soil, leaving the tip exposed.
- Water the buried section regularly; roots will form in a few months, and it can be cut and transplanted.
Both methods are effective for propagating woody plants, shrubs, and vines, allowing for new plants to develop while still connected to the parent plant, ensuring a higher success rate.

5. Choosing the Right Plants for Propagation
Selecting the right plants for propagation is crucial for success. Some plants are easier to propagate than others, making them ideal candidates for beginners or those looking to expand their garden quickly.
5.1 Easiest Plants to Propagate
-
Succulents:
- Many succulents can be propagated from leaf or stem cuttings.
- They root quickly in well-draining soil.
-
Herbs:
- Popular herbs like basil, mint, and rosemary propagate easily through cuttings.
- They often root quickly in water.
-
Houseplants:
- Plants like pothos, spider plants, and philodendrons are known for their ability to root from cuttings.
- They thrive in various conditions and are forgiving to beginners.
-
Perennials:
- Plants like daylilies, hostas, and peonies can be easily divided for propagation.
- They are often resilient and adapt well to new environments.
5.2 Tips for Selecting Healthy Parent Plants
-
Look for Healthy Growth:
- Select plants that are vibrant, free from pests, and disease-free.
- Avoid plants with yellowing leaves or signs of stress.
-
Choose Established Plants:
- Opt for mature plants that have been well-cared-for and have a robust root system.
- Younger plants may not have developed enough to provide successful cuttings.
5.3 Factors to Consider
-
Growth Habits:
- Consider whether the plant is a shrub, vine, or perennial, as different types have varying propagation needs.
-
Rooting Time:
- Research the average rooting time for the chosen plant species to set realistic expectations.
- Some plants may take longer to establish roots, so patience is key.
-
Environmental Conditions:
- Ensure that you can provide the necessary light, temperature, and humidity levels for successful propagation.
- Consider the plant’s natural habitat and replicate those conditions as closely as possible.
By carefully choosing the right plants for propagation and considering these factors, you can increase your chances of successful plant growth and expand your garden with confidence.
6. Preparing Your Cuttings
Proper preparation of cuttings is essential for successful propagation. Following best practices ensures that your cuttings have the best chance to root and develop into healthy plants.
6.1 Best Practices for Preparing Cuttings
-
Wound Healing:
- After taking a cutting, allow the cut end to callous over for a few hours or overnight. This process helps prevent rot and encourages root formation.
- Place cuttings in a cool, dry area, away from direct sunlight, during this healing phase.
-
Hormone Application:
- Applying rooting hormone can significantly enhance the rooting process.
- Dip the cut end of the cutting into rooting hormone before planting, ensuring it is coated well. Tap off any excess powder.
6.2 Importance of Proper Timing
The timing of taking cuttings is crucial for success. The best time to propagate plants is typically during their active growing season:
-
Spring:
- Ideal for most herbaceous plants and shrubs, as they are in their growth phase.
-
Summer:
- Suitable for softwood cuttings from plants that have completed their blooming cycle.
-
Fall:
- Some perennials can be divided or cut back for propagation.
6.3 Caring for Cuttings During the Initial Phase
Once your cuttings are prepared, it’s important to provide the right care to ensure successful rooting:
-
Humidity:
- Cover the cuttings with a plastic bag or use a humidity dome to maintain moisture levels.
- Remove the cover periodically to prevent mold and allow air circulation.
-
Watering:
- Keep the soil consistently moist but not soggy. Overwatering can lead to rot.
- Use a spray bottle to mist the cuttings and soil to maintain humidity without oversaturating.
-
Light:
- Place the cuttings in a bright area with indirect sunlight, avoiding direct sun exposure that can cause wilting.
By following these best practices for preparing and caring for your cuttings, you can significantly improve your chances of successful propagation and enjoy a flourishing garden.

7. Creating the Ideal Environment
Establishing the right environment is crucial for successful plant propagation. Factors like humidity, temperature, and light play significant roles in ensuring your cuttings thrive.
7.1 Importance of Humidity, Temperature, and Light
-
Humidity:
- High humidity levels help prevent cuttings from wilting and support the rooting process.
- Maintaining humidity around 70-90% is ideal for most cuttings.
-
Temperature:
- Most plants root best in warm conditions, typically between 65°F and 75°F (18°C - 24°C).
- A stable temperature encourages faster root development and overall plant health.
-
Light:
- Indirect light is essential for photosynthesis and overall plant growth, but direct sunlight can be harmful.
- Using grow lights can help provide adequate light levels, especially in low-light conditions.
7.2 Tips on Setting Up a Propagation Station
-
Choose the Right Location:
- Select a bright area with indirect sunlight or use grow lights to provide adequate illumination.
- Ensure the location is sheltered from drafts and extreme temperature fluctuations.
-
Utilize Containers:
- Use shallow trays or containers filled with a well-draining propagation mix.
- Consider using clear containers to monitor root development without disturbing the cuttings.
-
Cover for Humidity:
- Employ plastic domes or bags to create a humid environment around your cuttings.
- Ventilate occasionally to prevent mold growth and ensure air circulation.
7.3 Recommended Tools for Monitoring Environmental Conditions
-
Hygrometer:
- Measures humidity levels, helping you maintain optimal moisture for your cuttings.
-
Thermometer:
- Monitors temperature to ensure it stays within the ideal range for rooting.
-
Light Meter:
- Helps assess the light intensity in your propagation area, ensuring your cuttings receive adequate light.
By creating the ideal environment and using the right tools, you can significantly enhance the success rate of your plant propagation efforts.
8. Care and Maintenance of New Plants
Proper care and maintenance are essential for newly propagated plants to thrive. Following guidelines for watering, fertilization, and monitoring growth will help ensure your efforts are successful.
8.1 Watering Guidelines for Newly Propagated Plants
-
Initial Watering:
- Water newly propagated plants immediately after planting to establish moisture in the soil.
- Ensure the soil is damp but not soggy, as excess water can lead to root rot.
-
Ongoing Watering:
- Check the moisture level regularly. Water when the top inch of soil feels dry to the touch.
- Use a spray bottle for misting to maintain humidity without overwatering.
-
Water Quality:
- Use room-temperature water, as cold water can shock young plants.
- Avoid using chlorinated water; allow tap water to sit for 24 hours to dissipate chlorine.
8.2 Fertilization Tips to Promote Healthy Growth
-
Timing:
- Start fertilizing after new growth appears, usually a few weeks after propagation.
- Use a diluted, balanced fertilizer to avoid overwhelming young plants.
-
Type of Fertilizer:
- Liquid fertilizers are ideal for newly propagated plants as they provide nutrients quickly.
- Opt for a fertilizer with a balanced N-P-K ratio (e.g., 10-10-10) for general growth.
-
Application:
- Apply fertilizer every 4-6 weeks during the growing season, tapering off in fall and winter.
- Always follow the manufacturer’s instructions for dilution and application rates.
8.3 Signs of Success or Failure to Monitor After Propagation
Observing your new plants closely will help you determine whether your propagation efforts were successful:
-
Signs of Success:
- New growth (leaves, stems, or roots) indicates that the plant is establishing itself.
- Healthy color and firmness of leaves are signs of proper care and nutrient uptake.
- Rooting through the drainage holes of the container suggests that the plant is thriving.
-
Signs of Failure:
- Wilting or yellowing leaves can indicate overwatering, underwatering, or nutrient deficiency.
- Brown, mushy roots signify root rot, often caused by excessive moisture.
- Lack of growth or stunted development can suggest improper conditions or poor health of the parent plant.
By adhering to these care and maintenance guidelines, you can promote the healthy growth of your newly propagated plants and enjoy the fruits of your labor.

9. Troubleshooting Common Issues
Propagating plants can sometimes lead to challenges, but understanding common issues and their solutions will help you navigate the propagation process successfully. Here are some frequent problems encountered and how to address them.
9.1 Common Problems Faced During Propagation
-
Rot:
- Overwatering is the primary cause of root rot, leading to mushy roots and plant decline.
- Signs of rot include a foul smell, brown roots, and wilting leaves.
-
Mold:
- Mold growth can occur due to excessive humidity and poor air circulation around cuttings.
- Visible white or fuzzy patches on the soil surface or cuttings indicate mold presence.
-
Wilting:
- Wilting can result from underwatering or overwatering, leading to stress on the plant.
- Symptoms include drooping leaves and a general lack of turgor in the plant.
9.2 Solutions and Preventative Measures for Each Issue
-
Rot:
- Ensure well-draining soil and pots with drainage holes to prevent excess moisture.
- Water only when the top inch of soil feels dry to the touch, reducing the risk of overwatering.
- If rot occurs, remove the affected cuttings, let them dry out, and re-root healthy portions.
-
Mold:
- Increase air circulation by spacing out cuttings and using fans to improve airflow.
- Reduce humidity by opening covers or bags occasionally to prevent moisture buildup.
- If mold appears, remove affected cuttings immediately and treat the area with a fungicide if necessary.
-
Wilting:
- Assess soil moisture levels and adjust your watering routine accordingly.
- Ensure cuttings are placed in a suitable environment with appropriate humidity and temperature.
- If wilting persists, check for root damage or disease and adjust care practices.
9.3 Importance of Patience and Observation
Patience is vital during the propagation process. Not all cuttings will root successfully, and some may take longer than expected. Regular observation of your plants allows you to catch issues early and make necessary adjustments to your care routine. By remaining attentive to your plants’ needs and being patient throughout the process, you increase your chances of successful propagation.
10. Conclusion
In this article, we explored the essentials of plant propagation, including various methods, tools needed, and care techniques to ensure success. From understanding the differences between sexual and asexual propagation to troubleshooting common issues, you now have a comprehensive guide to help you thrive in your gardening journey. We encourage you to experiment with different propagation methods and discover which ones work best for your favorite plants. Remember, every gardener has a unique experience, so feel free to share your personal stories or ask any questions in the comments below. Happy propagating!
11. FAQ - Frequently Asked Questions
-
1. How long does it take for cuttings to root?
The rooting time for cuttings can vary based on the plant species and environmental conditions. Generally, it takes anywhere from a few weeks to several months for cuttings to develop roots.
-
2. Can I propagate plants in water?
Yes, many plants can be propagated in water. This method is particularly effective for certain species like pothos, spider plants, and some herbs. Ensure to change the water regularly for best results.
-
3. What is the best time of year to propagate plants?
The best time for propagation varies by plant type. However, spring and early summer are generally ideal due to favorable growing conditions and increased light availability.
-
4. Do I need special equipment for propagation?
While not mandatory, some basic tools can enhance your success in propagation. Commonly used items include sharp pruning shears, pots, well-draining soil, and rooting hormone.
-
5. How do I know if my cutting is successful?
Signs of a successful cutting include new growth, healthy leaf color, and root development. If you notice these indicators within a few weeks to months, your cutting is likely thriving.
You May Also Like
Grow Your Own Food: The Best Vegetables to Grow in Pots for Beginners – XRoci
Work Smart: Top Low-Light Plants for Offices That Boost Your Mood – XRoci
Growing Succulents Indoors: A Beginner’s Journey to Beautiful Greenery – XRoci


