Planting and Caring for Blackcurrant Bushes
- 1. Introduction
- 2. Choosing the Right Location for Blackcurrant Bushes
- 3. Preparing the Soil for Planting
- 4. Selecting the Right Variety of Blackcurrants
- 5. Planting Blackcurrant Bushes
- 6. Watering and Irrigation
- 7. Fertilizing Blackcurrant Bushes
- 8. Pruning Blackcurrant Bushes
- 9. Pest and Disease Management
- 10. Harvesting Blackcurrants
- 11. Common Problems and Troubleshooting
- 12. Growing Blackcurrants in Containers
- 13. Winter Care for Blackcurrant Bushes
- 14. FAQ - Frequently Asked Questions
1. Introduction
Blackcurrant bushes, scientifically known as Ribes nigrum, are a popular choice for home gardeners due to their resilience, high yield, and numerous benefits. These bushes, native to Europe and parts of Asia, are cherished for their dark purple-black berries, which are not only packed with nutrients but also versatile in the kitchen.
Understanding how to plant and care for blackcurrant bushes is essential for anyone looking to grow them successfully. With the right care, these bushes can produce abundant crops year after year, providing both a beautiful addition to your garden and a source of healthy, flavorful fruit.
Growing blackcurrants offers several benefits, making them a worthy investment for gardeners. Some of the key reasons to grow blackcurrants include:
- Nutritional Value: Blackcurrants are rich in vitamin C, antioxidants, and essential fatty acids. These nutrients support immune health, skin care, and heart health.
- Culinary Uses: The tart and tangy flavor of blackcurrants makes them a favorite in jams, jellies, sauces, desserts, and beverages.
- Low Maintenance: Blackcurrants are relatively easy to care for once established, making them suitable for both beginner and experienced gardeners.
- Health Benefits: Due to their high antioxidant content, blackcurrants can help reduce inflammation, boost brain function, and improve circulation.
- Attractive Bushes: Beyond their fruit, blackcurrant bushes have attractive foliage and flowers, making them an appealing addition to your garden landscape.
Whether you're an experienced gardener or just starting out, blackcurrant bushes are an excellent choice for your home garden. They thrive in many climates, require minimal care once established, and provide a rewarding harvest.

2. Choosing the Right Location for Blackcurrant Bushes
Choosing the right location for your blackcurrant bushes is crucial to ensure they thrive and produce a bountiful harvest. Blackcurrants are relatively hardy, but they have specific requirements for sunlight, soil, and space that need to be met for optimal growth. Let's explore the key factors to consider when selecting the ideal spot in your garden.
- Sunlight: Blackcurrant bushes require full sun to partial shade for optimal growth. They thrive in locations that receive at least 6 hours of direct sunlight per day. A sunny spot encourages healthy fruit development and higher yields, while partial shade may result in smaller berries.
- Soil: Blackcurrants prefer well-drained, loamy soil rich in organic matter. The soil should be moist but not waterlogged. Poor drainage can lead to root rot and other diseases. If your soil is clay-heavy or poorly draining, consider improving it with organic compost or planting in raised beds.
- Temperature: Blackcurrants grow best in temperate climates. They are cold-hardy and can tolerate temperatures down to -30°F (-34°C) when dormant, but they do best in areas with mild summers and cold winters. Extreme heat can stress the plants and reduce berry quality.
- Assessing Soil pH and Nutrient Levels: Blackcurrants thrive in slightly acidic soil, with a pH level between 5.5 and 6.5. Testing your soil’s pH is an essential step before planting. You can use a simple pH testing kit or send a sample to a local extension service for analysis. Based on the results, you may need to adjust the soil pH by adding lime to raise it or sulfur to lower it.
- Space and Air Circulation: Proper spacing is important for blackcurrant bushes to ensure good air circulation, which reduces the risk of diseases like powdery mildew. Space your bushes at least 3-4 feet apart. This gives them room to grow and allows the wind to circulate freely around the plants, helping to keep them healthy.
3. Preparing the Soil for Planting
Preparing the soil properly before planting blackcurrant bushes is essential to ensure they grow strong and healthy. The right soil conditions promote root development, enhance nutrient absorption, and help the bushes thrive. Here's how to get your soil ready for planting:
- Soil Amendments: Blackcurrants require nutrient-rich soil to thrive. To ensure healthy growth, enrich the soil with organic matter such as compost or well-rotted manure. These amendments improve soil structure, increase nutrient levels, and boost moisture retention. Spread a 2-3 inch layer of compost over the soil and work it in using a garden fork or tiller.
- Improving Soil Drainage: Proper drainage is crucial for blackcurrants, as they do not tolerate soggy roots. To test your soil's drainage, dig a small hole (about 6 inches deep), fill it with water, and observe how quickly it drains. If it takes more than 4 hours to drain, your soil may be too heavy and prone to waterlogging. To improve drainage, you can add sand or organic matter like compost, or consider planting in raised beds or mounds.
- Ideal Soil pH: Blackcurrants prefer slightly acidic soil, with an ideal pH range of 5.5 to 6.5. To test your soil's pH, you can purchase a soil test kit or send a sample to a local agricultural extension. If the soil is too acidic, you can raise the pH by adding lime. If it’s too alkaline, sulfur can help lower the pH to the optimal range for blackcurrants.
- Fertility Considerations: Fertile soil is essential for strong blackcurrant growth. Before planting, ensure that your soil is rich in essential nutrients like nitrogen, phosphorus, and potassium. If a soil test indicates any deficiencies, you can correct them by adding the appropriate fertilizer. Organic fertilizers such as compost or fish emulsion are excellent choices as they provide slow-release nutrients that benefit the plants over time.
4. Selecting the Right Variety of Blackcurrants
Selecting the right variety of blackcurrants is an important step in ensuring you get the best possible harvest. Different varieties offer different advantages in terms of flavor, disease resistance, and yield potential. Understanding the traits of each variety can help you make the right choice based on your specific needs, such as fresh eating or making jams.
-
Common Varieties: Some of the most popular varieties of blackcurrants include:
- 'Ben Nevis': Known for its sweet yet tart flavor, this variety is ideal for fresh eating and high yields.
- 'Ben Sarek': This variety offers a slightly tart flavor, making it perfect for jam-making and has moderate yield potential.
- 'Ribes nigrum': A very tart variety, this is commonly used for commercial purposes due to its high yield potential, though it has low disease resistance.
-
Pros and Cons of Different Varieties: Each variety comes with its own set of advantages and disadvantages:
- 'Ben Nevis': High disease resistance and yield potential make it an excellent choice for home gardeners seeking fresh blackcurrants. The flavor profile is a perfect balance of sweet and tart.
- 'Ben Sarek': This variety is best for making jams and jellies due to its slightly tart flavor, though it has a moderate yield potential and moderate disease resistance.
- 'Ribes nigrum': While this variety yields heavily, its very tart flavor and lower disease resistance make it more suited to commercial use or when specific culinary needs are required.
- Choosing Based on Climate and Purpose: When selecting a variety, consider both the climate in your region and your intended use for the blackcurrants. For fresh eating, choose varieties with a balanced flavor, like 'Ben Nevis.' For jam-making, 'Ben Sarek' may be more suitable due to its tartness and moderate yield. Climate also plays a role; colder climates may benefit from more cold-hardy varieties like 'Ben Nevis,' while warmer areas may favor varieties that can handle heat better.
| Variety | Flavor Profile | Disease Resistance | Yield Potential | Best For |
|---|---|---|---|---|
| Ben Nevis | Sweet, tart | High | High | Fresh Eating |
| Ben Sarek | Slightly tart | Moderate | Moderate | Jam Making |
| Ribes nigrum | Very tart | Low | High | Commercial Use |
By carefully selecting the right variety based on your region and intended use, you can ensure that your blackcurrant bushes thrive and provide the best possible results in your garden.

5. Planting Blackcurrant Bushes
Planting blackcurrant bushes correctly is essential for ensuring healthy growth and high yields. With the right technique, you can set your bushes up for success, whether you're planting bare-root plants or potted ones. Here’s a step-by-step guide to planting blackcurrant bushes.
-
Step-by-Step Planting Guide:
- 1. Prepare the planting hole: Start by digging a hole that is wide and deep enough to accommodate the roots of the blackcurrant bush. The hole should be approximately 18 inches wide and 12-18 inches deep, depending on the size of the plant. Loosen the soil around the hole to help the roots spread easily.
- 2. Prepare the roots: If you are planting bare-root blackcurrants, soak the roots in water for a few hours before planting. This ensures they have enough moisture to establish themselves in the soil. If you're planting a potted plant, gently remove it from the pot, being careful not to damage the roots.
- 3. Position the plant: Place the blackcurrant bush in the center of the hole. Ensure that the root collar (where the roots meet the stem) is level with or slightly above the soil surface. Planting too deep can cause the plant to rot, while planting too shallow can expose the roots.
- 4. Backfill with soil: Carefully backfill the hole with soil, making sure the bush is upright and well-positioned. Press the soil gently around the roots to eliminate air pockets.
-
Planting Depth and Spacing:
- Depth: As mentioned, the root collar should be level with or slightly above the ground. This ensures the plant's roots remain healthy and well-drained.
- Spacing: Space blackcurrant bushes at least 3-4 feet apart to allow for proper air circulation and root growth. Proper spacing will also help prevent the spread of diseases.
- Watering Immediately After Planting: Once you’ve planted the bush, water it thoroughly to settle the soil around the roots. This helps remove any air pockets and ensures the plant has enough moisture to establish itself. Keep the soil consistently moist for the first few weeks to encourage strong root growth.
-
Best Time to Plant:
- Autumn (Fall): The ideal time to plant blackcurrants is in the autumn, after the heat of summer has passed but before the ground freezes. This gives the roots time to establish before winter.
- Spring: Spring is another good time to plant, especially if you are planting container-grown blackcurrants. Just be sure to wait until the soil is workable and the threat of frost has passed.
6. Watering and Irrigation
Proper watering is crucial for the healthy growth of blackcurrant bushes. While they prefer consistently moist soil, overwatering or underwatering can lead to various issues. Understanding how much water they need and the best irrigation techniques will ensure your plants thrive.
-
Watering Requirements:
- Consistently Moist Soil: Blackcurrant bushes thrive in soil that is consistently moist but not soggy. They need regular watering, especially during dry periods, but excessive water can lead to root rot.
- Depth of Watering: Water should reach deep into the soil to encourage the roots to grow downward, helping the plant establish itself. Shallow watering can result in weak roots and poor plant development.
-
Efficient Watering Methods:
- Drip Irrigation: Drip irrigation is the most efficient way to water blackcurrant bushes. This method delivers water directly to the soil around the roots, minimizing evaporation and ensuring that the moisture is distributed evenly. It also reduces the risk of diseases that can occur when water is splashed onto the leaves.
- Traditional Watering: Traditional watering methods, such as using a hose or watering can, can be effective, but care must be taken to water the base of the plant rather than wetting the foliage. Water deeply to ensure the roots get enough moisture.
-
Signs of Overwatering or Underwatering:
- Overwatering: Symptoms of overwatering include yellowing leaves, wilting despite wet soil, and root rot (mushy or blackened roots). To fix overwatering, improve soil drainage and reduce watering frequency.
- Underwatering: Signs of underwatering include dry, brittle leaves, leaf drop, and stunted growth. If this happens, increase watering and ensure the plant is getting enough moisture at the root level.
7. Fertilizing Blackcurrant Bushes
Fertilizing blackcurrant bushes is essential to ensure they receive the nutrients needed for healthy growth and high fruit yield. Both organic and chemical fertilizers can be used, but understanding when and how to apply them is key to maximizing your harvest.
-
Organic vs. Chemical Fertilizers:
- Organic Fertilizers: Organic options, such as compost, well-rotted manure, or organic plant food, are beneficial for long-term soil health. They improve soil structure and provide a slow, steady release of nutrients.
- Chemical Fertilizers: Chemical fertilizers, like ammonium nitrate or superphosphate, provide quick-release nutrients and can promote faster growth. However, they may not improve soil structure or long-term fertility, and they can sometimes lead to nutrient imbalances if not used properly.
-
Best Time to Fertilize:
- Spring: Fertilize in early spring, just before new growth starts, to give your blackcurrant bushes a nutrient boost as they begin their growing season. This helps encourage strong, healthy foliage and root development.
- After Harvest: Another good time to fertilize is after the harvest. A light application of fertilizer helps the bushes recover from fruiting and supports the development of next year’s buds.
-
Essential Nutrients for Blackcurrants:
- Nitrogen (N): Nitrogen is essential for leaf and shoot growth. It helps the plant produce lush, green foliage and supports overall plant health.
- Phosphorus (P): Phosphorus promotes strong root development and helps the plant establish a solid foundation for future growth. It’s also important for flowering and fruiting.
- Potassium (K): Potassium helps the plant resist diseases, improve fruit quality, and enhance drought tolerance. It also plays a role in photosynthesis and overall plant metabolism.
-
Fertilizer Application Rates:
- Early Growth (Spring): Apply a balanced fertilizer at a rate of 1 to 2 tablespoons per square foot around the base of the plant, ensuring it is lightly worked into the soil.
- Mid-Season (Post-Harvest): Apply a low-nitrogen fertilizer or compost to encourage root growth and prepare the plant for the next season. A light application is sufficient—around 1 tablespoon per square foot.

8. Pruning Blackcurrant Bushes
Pruning blackcurrant bushes is an essential practice for ensuring healthy growth, improving air circulation, and maximizing fruit yields. Proper pruning helps the plant maintain a strong structure, encourages new growth, and increases the amount and quality of the fruit produced.
-
Why Pruning is Essential:
- Promotes Healthy Growth: Pruning helps remove dead, damaged, or diseased wood, preventing the spread of diseases and encouraging the growth of fresh, healthy shoots.
- Higher Yields: By removing old or unproductive wood, the plant can direct more energy into producing fruit-bearing branches, resulting in higher yields and better-quality fruit.
-
Best Time to Prune:
- Late Winter or Early Spring: The best time to prune blackcurrant bushes is in late winter or early spring, before new growth starts. This timing helps minimize damage to the plant while ensuring that the plant is ready to put its energy into fresh growth.
- Avoid Pruning During Active Growth: Avoid pruning during the growing season, as this can stress the plant and reduce fruit production.
-
Step-by-Step Pruning Guide:
- Remove Dead or Damaged Wood: Start by cutting out any dead or damaged branches. This will help improve the plant’s overall health and prevent diseases from spreading.
- Thin for Air Circulation: Thin out crowded branches to improve air circulation. This reduces the risk of fungal diseases and helps the plant’s leaves dry out faster after rain, minimizing disease risk.
- Cut Back Old Growth: Blackcurrant bushes produce the best fruit on 1- to 2-year-old wood. Remove older, unproductive wood to make room for new, more productive branches.
-
Shaping the Bush for Better Fruit Production:
- Open Center Shape: Aim to create an open, vase-like shape with the main stems radiating outward. This allows light to penetrate and ensures that the plant’s energy is focused on producing fruit rather than excessive growth.
- Encourage Strong Canes: Make sure to leave 3-5 strong canes that are no older than three years. These will be the primary fruit-bearing branches in the upcoming seasons.
-
Common Mistakes to Avoid:
- Pruning Too Much: Over-pruning can damage the plant and reduce fruit yield. Always leave some healthy, productive wood when pruning.
- Pruning During Growing Season: Avoid pruning during the growing season, as this can stress the plant and interfere with fruit production.
- Not Removing Dead Wood: Dead or damaged wood should always be removed, as it can harbor diseases and pests that may harm the bush.
9. Pest and Disease Management
Blackcurrant bushes are susceptible to various pests and diseases that can negatively impact their growth and fruit production. Managing these threats effectively through regular monitoring, preventive measures, and targeted treatments is essential to ensure healthy bushes and a bountiful harvest.
-
Common Pests Affecting Blackcurrants:
- Aphids: Aphids are small, sap-sucking insects that can weaken the plant and transmit viruses. They often cluster on new growth, causing distortion of leaves and stems.
- Spider Mites: These tiny arachnids can cause yellowing and speckling on leaves. Severe infestations can lead to defoliation and reduced vigor.
- Caterpillars: Caterpillars, especially from moth species, feed on the leaves of blackcurrant bushes, damaging foliage and potentially defoliating the plant.
-
Diseases That Blackcurrant Bushes Are Prone To:
- Powdery Mildew: This fungal disease causes a white, powdery coating on leaves and stems. It thrives in humid conditions and can reduce photosynthesis and vigor, leading to poor fruit production.
- Leaf Spot: Leaf spot diseases, such as Septoria leaf spot, cause dark, irregular spots on leaves. In severe cases, the leaves may die prematurely, affecting overall plant health.
-
Organic and Chemical Methods for Pest Control:
-
Organic Methods:
- Insecticidal Soap: Insecticidal soap can be sprayed directly onto pests like aphids and spider mites to kill them without harming beneficial insects.
- Neem Oil: Neem oil is a natural pesticide that controls a wide range of pests and diseases, including aphids and powdery mildew.
- Beneficial Insects: Introducing natural predators such as ladybugs and lacewing larvae can help control aphids and other pests.
- Chemical Methods: Chemical insecticides and fungicides are available for more severe infestations. However, they should be used cautiously and according to label instructions to minimize harm to beneficial insects and the environment.
-
Organic Methods:
-
Preventive Measures:
- Proper Spacing: Ensure adequate space between bushes to improve air circulation, reducing the risk of fungal diseases like powdery mildew.
- Remove Diseased Leaves: Regularly remove any infected or damaged leaves from the bush to prevent the spread of disease.
- Regular Monitoring: Check bushes regularly for signs of pests or disease and take action promptly to address any issues.

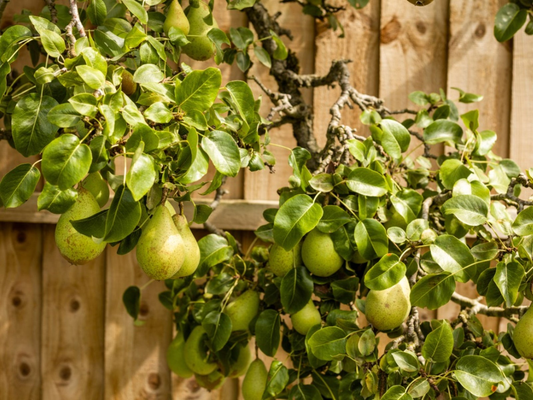
10. Harvesting Blackcurrants
Harvesting blackcurrants at the right time and in the correct way is crucial for preserving their flavor, texture, and nutritional value. With proper timing and careful handling, you can enjoy your homegrown blackcurrants fresh, frozen, or in homemade preserves.
-
When to Harvest Blackcurrants:
- Timing Based on Fruit Color: Blackcurrants are typically ready to harvest when they have turned a deep purple or black. The berries should be fully colored and slightly soft to the touch.
- Ripeness: Taste is also an important indicator. Ripe blackcurrants are sweet-tart in flavor, and under-ripe fruit will taste sour and astringent.
- Harvesting Window: Blackcurrants usually ripen in mid-to-late summer, depending on the variety and climate conditions. Ensure the fruit is fully ripe before picking to achieve the best flavor.
-
How to Harvest Blackcurrants Without Damaging the Bush:
- Use Gentle Hand Picking: Harvest blackcurrants by gently pulling the clusters off the stems. Use both hands to support the bush while picking to avoid damaging branches.
- Pick in Batches: If the bush has multiple clusters of fruit, consider picking the ripe berries in stages to avoid overripe or underripe berries mixed in with the harvest.
- Be Careful of Thorns: Some blackcurrant varieties have thorny branches. Take care not to injure yourself or damage the plant while harvesting.
-
Best Practices for Storing and Preserving the Fruit:
- Freezing: Blackcurrants freeze well and can be stored for months. Simply wash and dry the berries, then freeze them on a tray before transferring to a container or freezer bag to prevent clumping.
- Making Jams: Blackcurrants are perfect for making jams, jellies, or sauces due to their natural pectin content. After harvesting, wash and prepare the fruit for preserving.
- Fresh Storage: Fresh blackcurrants can be kept in the refrigerator for up to a week. Store them in a breathable container to avoid moisture buildup and mold growth.
11. Common Problems and Troubleshooting
Like all plants, blackcurrant bushes may face challenges during their growth cycle. Recognizing problems early on and addressing them promptly can prevent long-term damage and ensure healthy growth and fruit production. In this section, we’ll discuss some common issues with blackcurrants and how to resolve them.
-
Identifying Yellowing Leaves or Stunted Growth:
- Possible Causes of Yellowing Leaves: Yellowing leaves can indicate nutrient deficiencies, particularly nitrogen or iron. It may also be a sign of water stress or poor drainage.
- Stunted Growth: Stunted growth can result from overwatering, root rot, or poor soil conditions. If your bush isn’t growing well, check for compacted soil or lack of essential nutrients.
- Diseases: Fungal diseases like powdery mildew can cause yellowing or wilting leaves. Poor air circulation and excessive moisture contribute to these problems.
-
Dealing with Poor Fruit Production or Underdeveloped Berries:
- Insufficient Pollination: Blackcurrants rely on proper pollination to produce high yields. If you notice poor fruit production, consider planting a second variety to ensure cross-pollination.
- Environmental Factors: Poor sunlight, excessive shading, or improper watering can result in underdeveloped berries. Ensure your plants receive enough sunlight and maintain consistent moisture levels.
- Nutrient Imbalance: An imbalance in soil nutrients, particularly a lack of potassium or phosphorus, can hinder fruit development. Fertilizing the soil correctly can improve fruit production.
-
Solutions for Common Blackcurrant Problems:
- Yellowing Leaves: Correct nutrient deficiencies by adding organic matter, compost, or specific fertilizers to the soil. For iron deficiency, consider using chelated iron.
- Stunted Growth: Improve soil structure by adding organic matter to enhance drainage and aeration. Ensure the plant is not stressed by pests or diseases.
- Underdeveloped Berries: Ensure proper watering, adequate sunlight, and sufficient nutrients. Consider pruning excess foliage to allow better airflow and light penetration.
-
How to Prevent Issues Through Proper Care:
- Regular Monitoring: Regularly check your blackcurrant bushes for pests, diseases, and signs of stress.
- Proper Spacing: Ensure your bushes are spaced properly to allow for good air circulation, preventing fungal diseases and promoting healthy growth.
- Consistent Care: Maintain consistent watering and fertilizing schedules, and prune the bushes at the right times to keep them healthy and productive.
12. Growing Blackcurrants in Containers
Growing blackcurrants in containers offers a great solution for gardeners with limited space or poor soil conditions. Container growing allows you to maintain full control over soil quality, drainage, and location, making it an excellent choice for urban or apartment gardening. However, it does come with unique challenges that need to be addressed to ensure healthy growth and fruitful production.
-
Benefits of Container Growing:
- Ideal for Smaller Spaces: Containers are perfect for gardeners with limited yard space, such as those in apartments, patios, or balconies.
- Control Over Soil Quality: You can create the perfect growing medium in containers, especially if your garden soil is too heavy, poor in nutrients, or poorly drained.
- Portability: Container-grown blackcurrants can be moved to a sunnier spot or brought indoors during harsh weather conditions, offering versatility.
-
Choosing the Right Size Container:
- Container Size: Choose a large container, at least 18-24 inches in diameter, to allow enough room for root growth. Larger pots (up to 30 inches) are ideal for supporting the bush long-term.
- Material: Containers can be made from plastic, ceramic, or wood. Ensure the material provides good drainage and prevents overheating in hot weather.
- Drainage: Make sure the container has proper drainage holes to prevent waterlogging, which can lead to root rot.
-
How to Care for Container-Grown Blackcurrants:
- Watering: Container-grown blackcurrants need regular watering to maintain consistent moisture levels. Check the soil regularly and water deeply when it feels dry to the touch.
- Feeding: Use a balanced fertilizer every few weeks during the growing season. Organic fertilizers like compost or slow-release pellets work well for container plants.
- Repotting: Container-grown blackcurrants should be repotted every 2-3 years to refresh the soil and ensure the roots have enough room to grow.
-
Challenges to Be Aware of with Container Growing:
- Watering Issues: Containers can dry out quickly in hot weather, so regular watering is crucial to avoid stress or dehydration.
- Root Bound Plants: Over time, the roots may outgrow the container, leading to poor growth. Repotting or pruning the roots can resolve this.
- Temperature Extremes: Containers are more susceptible to temperature fluctuations, which may cause the soil to heat up or freeze faster than in the ground. Provide shade in summer and insulation in winter.

13. Winter Care for Blackcurrant Bushes
Preparing your blackcurrant bushes for winter is essential to ensure they survive the cold months and emerge healthy in spring. Winter care varies depending on whether the bushes are grown in the ground or containers, but the goal is always to protect them from frost damage and harsh weather. This section will cover key steps to help your blackcurrants endure the winter.
-
Preparing Blackcurrant Bushes for Winter:
- Mulching: Apply a thick layer of mulch around the base of the bush to protect the roots from freezing temperatures. Organic materials like straw, compost, or wood chips work well.
- Cutting Back Growth: Prune any dead or damaged wood before winter to prevent disease and allow the plant to focus its energy on survival.
- Watering Before Winter: Ensure the bush is well-watered before the ground freezes. This helps prevent dehydration over the winter months.
-
How to Prevent Winter Damage:
- Covering with Burlap: If your area experiences severe winter conditions, wrap the bush with burlap or other breathable materials to shield it from frost and windburn.
- Using Protective Frames: Construct a frame around the bush and cover it with frost-protecting fabric or plastic. Ensure adequate ventilation to avoid mold buildup.
- Snow Insulation: A light layer of snow can actually help insulate the bushes. If snow accumulates, it can protect the bush from extreme temperatures.
-
Winter Care for Container-Grown Blackcurrants:
- Move Containers to a Protected Area: Bring container-grown blackcurrants indoors or place them in a sheltered spot, like a garage or shed, where they can avoid frost.
- Insulate the Container: Wrap the container in burlap, bubble wrap, or foam to protect the roots from freezing. You can also place the container on a layer of mulch or straw for extra insulation.
- Check Moisture Levels: Even in winter, container plants may need occasional watering. Check the moisture level periodically to prevent the soil from completely drying out.
-
Signs of Frost Damage and How to Address It:
- Wilting or Blackened Leaves: If leaves turn black or wilt after frost, this could indicate frost damage. Remove damaged leaves to prevent disease spread and encourage new growth in spring.
- Cracked or Splintered Bark: Extreme cold can cause the bark to split. If this occurs, prune back the damaged areas and apply a tree wound sealant to protect exposed tissue.
- Frozen Roots: If the roots freeze, the bush will not be able to take up water in the spring. Mulching heavily around the base before winter can prevent this.
14. FAQ - Frequently Asked Questions
Blackcurrants are a popular choice for gardeners due to their hardy nature and bountiful harvests. Below are answers to some of the most frequently asked questions about planting and caring for blackcurrant bushes.
-
What is the best time to plant blackcurrant bushes?
- The best time to plant blackcurrant bushes is during the early spring or late fall when the weather is cooler, and the plants are dormant. This allows them to establish their roots before the growing season begins.
-
Can blackcurrants grow in partial shade?
- Blackcurrants prefer full sun to thrive, but they can tolerate partial shade. However, the yields may be lower, and the growth may be less vigorous compared to plants grown in full sunlight.
-
How do I protect blackcurrant bushes from birds?
- Birds love the sweet berries of blackcurrant bushes, and they can quickly strip the plants of fruit. To protect your bushes, try the following:
- Use netting or mesh around the bushes to prevent birds from reaching the fruit.
- Install bird scare devices like shiny objects, wind chimes, or reflective tape.
- Consider placing a scarecrow or decoy predator near the plants.
- Birds love the sweet berries of blackcurrant bushes, and they can quickly strip the plants of fruit. To protect your bushes, try the following:
-
How long does it take for blackcurrant bushes to bear fruit?
- Blackcurrant bushes typically take 2-3 years to bear fruit if grown from a cutting or purchased as a bare-root plant. If grown from seed, it may take longer—up to 5 years—to yield fruit.
-
Can I grow blackcurrants in a hot climate?
- Blackcurrants thrive in cooler climates with temperatures ranging from 60°F to 70°F (15°C to 21°C). They are not well-suited for hot climates. If you live in a hotter area, try growing blackcurrants in a slightly shaded spot to protect them from excessive heat.
-
What are the best companion plants for blackcurrants?
- Blackcurrants grow well with several companion plants that can improve their health and deter pests. Some of the best companions include:
- Garlic and onions: These plants help repel aphids and other pests that might damage blackcurrants.
- Chives: Chives can act as a pest deterrent and also provide flavoring in the garden.
- Marigolds: These flowers attract beneficial insects and help keep harmful pests away from the bushes.
- Blackcurrants grow well with several companion plants that can improve their health and deter pests. Some of the best companions include:
-
Are blackcurrant bushes self-pollinating?
- Yes, blackcurrant bushes are generally self-pollinating, meaning they don’t require another bush to produce fruit. However, planting more than one bush can help improve fruit set and increase yield due to better pollination.