Top 10 Container Gardening Tips for Beginners and Experts Alike
Share
Table of Contents
1. Introduction
Container gardening has gained massive popularity over the years due to its versatility and accessibility. Whether you live in a small apartment with limited outdoor space or have a large garden but want to add flexibility to your planting, container gardening offers a convenient solution. Both beginners and experts find it appealing because it allows for more control over the environment, making it easier to manage plant growth.
This blog aims to provide actionable tips that cater to both beginners and experts. Whether you're just starting or looking to refine your skills, you'll find insights here to help you master container gardening.
- Learn how to choose the right containers for different plants.
- Understand the importance of using the correct potting mix and soil.
- Master watering techniques and prevent common issues like root rot.
- Discover companion planting and other advanced strategies for expert gardeners.
By the end of this guide, you'll have the knowledge to create a thriving container garden, no matter your skill level or space constraints.

2. Choosing the Right Containers
Choosing the right containers is a critical step in ensuring the success of your container garden. The type of container you choose can affect the health, growth, and yield of your plants. It's essential to consider factors such as material, size, and drainage when selecting the perfect container for your plants.
1. Importance of Container Selection
- Different materials provide various benefits, such as moisture retention and insulation.
- Container size directly impacts root growth and nutrient availability for your plants.
- Proper drainage is essential to prevent waterlogging and root rot, two common issues in container gardening.
2. Materials: Plastic, Terracotta, and Ceramic
- Plastic: Lightweight, affordable, and retains moisture well, but may not provide the best insulation in extreme weather conditions.
- Terracotta: Breathable and aesthetically pleasing, but it dries out faster and may require more frequent watering.
- Ceramic: Heavier and more durable, these containers offer good insulation, but you need to ensure they have proper drainage holes.
3. Size and Drainage Needs
- Smaller containers are suitable for herbs and small flowers, while larger containers are better for vegetables or plants with deep roots.
- Ensure that your containers have drainage holes to allow excess water to escape and prevent water from accumulating at the bottom.
- If the container doesn’t come with drainage holes, consider drilling some or adding a layer of stones at the bottom to improve drainage.
4. Different Plants, Different Containers
- Herbs and succulents thrive in smaller containers that don’t retain too much water.
- Vegetables and larger flowering plants need more room for root expansion and may require deeper or wider containers.
- For climbing plants like tomatoes, consider using containers with support structures such as trellises.
By carefully selecting the right containers, you'll create an optimal growing environment that matches the specific needs of your plants.
3. Understanding Soil and Potting Mix
Choosing the right soil is essential for the health and productivity of your container garden. Unlike in-ground plants, container plants are confined to a limited space, making the quality of the soil and potting mix critical. Garden soil is not ideal for containers, which is why using a high-quality potting mix is recommended.
1. Importance of Using Quality Potting Soil
- Garden soil tends to compact in containers, restricting airflow to plant roots.
- Potting soil is lighter, well-draining, and aerated, ensuring that plant roots receive enough oxygen and water.
- Using quality potting soil reduces the risk of soil-borne diseases and pests.
2. Differences Between Soil Types for Various Plants
- Vegetables: Require a nutrient-rich, well-draining potting mix. Look for soil blends that include compost or manure for added nutrients.
- Flowers: Benefit from a balanced potting mix that holds moisture without becoming waterlogged. Consider using mixes with peat or coco coir.
- Herbs: Prefer a more sandy, well-draining mix. Herbs like rosemary and thyme thrive in soils that dry out quickly between watering.
3. Improving Drainage and Nutrient Retention with Additives
- Perlite: Adds aeration to the soil, improving drainage and preventing compaction. It’s particularly useful for plants that don’t tolerate soggy roots, like succulents and cacti.
- Vermiculite: Helps retain moisture and nutrients in the soil. It’s ideal for plants that require consistent moisture, such as vegetables and leafy greens.
- Compost: Enhances nutrient content and boosts microbial activity in the soil, providing plants with slow-release nutrients.
- Sand: Used to increase drainage in potting mixes, especially for herbs and succulents that prefer drier conditions.
By understanding the differences in soil types and incorporating the right additives, you can create the perfect growing medium that ensures proper drainage and nutrient retention for each plant type in your container garden.

4. Watering Techniques for Containers
Watering is one of the most crucial aspects of maintaining a successful container garden. Container plants often have different watering needs compared to in-ground plants due to the limited soil volume and increased exposure to air. Understanding proper watering techniques is key to ensuring healthy and thriving plants.
1. Differences Between Container and In-Ground Plants
- Containers dry out faster than garden soil because they have less volume and are more exposed to the elements.
- Watering frequency is higher for container plants, especially in hot and windy conditions.
- In-ground plants can draw moisture from deeper soil layers, while container plants rely solely on the water provided to their limited space.
2. Watering Frequency and Signs of Over/Under-Watering
-
Watering Frequency:
- Smaller containers need watering more often, sometimes daily during the hottest months.
- Larger containers hold more moisture, so they may need watering every 2-3 days.
- Water early in the morning or late in the evening to minimize evaporation during hot weather.
-
Signs of Over-Watering:
- Yellowing leaves and wilting despite wet soil.
- Mold growth on the soil surface.
- Water pooling at the bottom of the container due to clogged drainage or excess water.
-
Signs of Under-Watering:
- Dry, brittle leaves that may curl at the edges.
- Soil pulling away from the edges of the container, creating gaps.
- Plants wilting, especially during the hottest part of the day.
3. Benefits of Self-Watering Containers
- Self-watering containers feature a built-in reservoir that allows plants to draw water as needed, reducing the risk of over or under-watering.
- They provide consistent moisture, especially for plants that prefer even soil moisture, like tomatoes and leafy greens.
- Ideal for busy gardeners or during periods when regular watering is difficult, such as vacations.
- Help conserve water by reducing evaporation, as water is stored in a closed system.
- Make container gardening more beginner-friendly by reducing the guesswork around watering schedules.
Mastering the right watering techniques for container gardening ensures your plants receive the optimal moisture levels they need to thrive. Paying attention to your plants’ watering needs and considering self-watering containers can reduce the risks associated with over or under-watering.
5. Fertilizing Container Plants
Fertilizing container plants is crucial for maintaining healthy growth, as nutrients in container soil get depleted faster than in-ground soil. Since container plants rely on a limited amount of soil, it’s essential to replenish their nutrients regularly. The right fertilization techniques can help your plants thrive throughout the growing season.
1. Importance of Regular Fertilization
- In containers, water drains quickly, taking essential nutrients with it, leading to faster depletion of soil fertility.
- Without regular fertilization, plants may show signs of nutrient deficiencies, such as stunted growth or discolored leaves.
- Fertilizing regularly ensures that container plants receive the nutrients they need to produce strong roots, healthy foliage, and abundant flowers or fruits.
2. Types of Fertilizers: Organic vs. Synthetic
-
Organic Fertilizers:
- Made from natural sources like compost, manure, and plant materials.
- Improve soil structure and increase microbial activity, promoting long-term soil health.
- Slower to release nutrients, but provide steady nourishment over time.
-
Synthetic Fertilizers:
- Manufactured from chemical compounds, offering precise nutrient formulations.
- Deliver nutrients quickly, making them ideal for fast-growing plants or those showing signs of deficiency.
- Can be more concentrated, requiring careful application to avoid over-fertilizing.
3. How and When to Fertilize Container Plants
- Start fertilizing early in the growing season when plants are actively growing.
- Use a diluted liquid fertilizer every 2-4 weeks to provide consistent nutrients without overwhelming the plants.
- For slow-release fertilizers, apply once at the beginning of the growing season and reapply mid-season if necessary.
- For flowering plants, use fertilizers with higher phosphorus content to promote blooming.
- Monitor your plants for signs of nutrient deficiency, such as yellowing leaves or poor growth, and adjust fertilization accordingly.
Regular fertilization is key to keeping container plants healthy and productive. Whether you choose organic or synthetic fertilizers, ensuring that your plants receive the right nutrients at the right time will help them flourish.

6. Maximizing Sunlight and Shade
Understanding your plants’ light requirements is crucial to the success of your container garden. Different plants have varying needs for sunlight, and providing the right amount is key to their growth. With containers, you have the flexibility to move plants around to maximize sunlight or provide shade when necessary.
1. Importance of Understanding Light Requirements
- Full Sun Plants: Require 6-8 hours of direct sunlight per day. Examples include tomatoes, peppers, and most herbs.
- Partial Sun/Partial Shade Plants: Thrive with 3-6 hours of sunlight, often preferring morning sun and afternoon shade. Examples include lettuce, spinach, and some flowers like begonias.
- Shade Plants: Require less than 3 hours of direct sunlight and prefer indirect light or dappled shade. Ferns and hostas are popular shade plants.
- Providing the right light ensures plants photosynthesize effectively, promoting strong growth and healthy development.
2. Positioning Containers for Optimal Sunlight
- Place containers in locations where they will receive the recommended amount of sunlight based on the plant’s needs.
- Observe your garden throughout the day to see where the sun hits during morning, noon, and late afternoon.
- Move containers to sunnier spots if plants are not receiving enough light, especially during the growing season.
- For full sun plants, consider placing them on a south-facing balcony or patio to ensure they get maximum sunlight exposure.
- Use plant stands or risers to elevate containers to areas with better sunlight.
3. Using Shade Strategically for Delicate Plants
- Some plants, like lettuce and ferns, prefer cooler temperatures and partial shade, especially during hot summer days.
- Position delicate plants under taller plants or near walls that provide shade during the hottest parts of the day.
- Use shade cloths or umbrellas to create temporary shade if you cannot move containers, preventing sunburn or wilting.
- Rotating plants or shifting them to a shaded area during the hottest hours can help protect more sensitive plants.
Maximizing sunlight and providing shade strategically can make a big difference in the success of your container garden. By understanding your plants’ light requirements and making adjustments to their positioning, you can ensure they receive the ideal amount of sunlight for healthy growth.

7. Companion Planting in Containers
Companion planting involves growing different plants together to promote mutual benefits like pest control, better growth, or improved flavor. This technique works particularly well in container gardening, where space is limited, and plants can help each other thrive. When done correctly, companion planting can lead to healthier plants, higher yields, and more efficient use of space.
1. Benefits of Companion Planting
- Some plants can repel pests that harm their companions, reducing the need for chemical pesticides.
- Certain plants improve the soil by fixing nitrogen or adding organic matter, benefitting the other plants in the container.
- Growing compatible plants together can enhance flavor, especially in herbs and vegetables.
- Companion planting helps maximize the use of limited space, allowing you to grow more in one container.
2. Examples of Companion Plants for Containers
- Tomatoes and Basil: Basil helps repel pests like aphids and improves the flavor of tomatoes.
- Lettuce and Radishes: Radishes grow quickly and provide shade for lettuce, helping it stay cool and prevent bolting.
- Carrots and Chives: Chives deter carrot flies, protecting your carrot crop.
- Peppers and Marigolds: Marigolds help repel nematodes and other pests that can damage pepper plants.
3. Arranging Multiple Plants in One Container
- Select plants that have complementary needs in terms of water, sunlight, and soil requirements.
- Place taller plants like tomatoes or peppers in the center or back of the container to provide shade for smaller plants.
- Use trailing plants, such as herbs or strawberries, around the edges of the container to maximize space and create a visually appealing arrangement.
- Ensure enough space between plants to allow air circulation and prevent overcrowding, which can lead to disease.
Companion planting is a great way to increase productivity and improve plant health in container gardening. By carefully selecting plants that grow well together, you can create beautiful, thriving containers that maximize both space and yield.
8. Pruning and Maintenance for Healthy Container Gardens
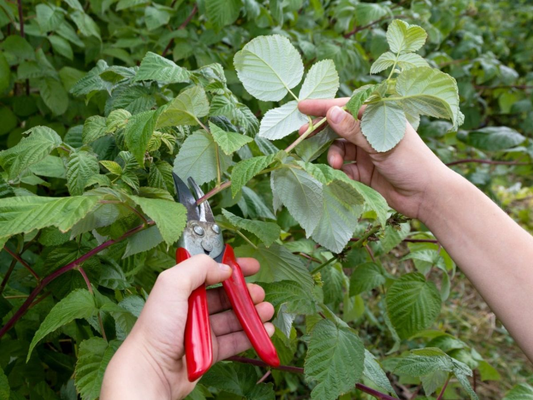
Maintaining a healthy container garden requires regular attention to pruning, deadheading, and overall cleanliness. These practices not only keep your plants looking their best but also promote stronger growth and help prevent diseases or pest infestations. Proper maintenance can significantly increase the longevity and productivity of your container plants.
1. Regular Pruning for Plant Health
- Pruning helps control the size of your plants, which is particularly important in containers where space is limited.
- Removing dead or damaged branches encourages new growth and improves air circulation, reducing the risk of diseases.
- Prune flowering plants to remove spent blooms (deadheading) to encourage continuous blooming.
- For fruiting plants like tomatoes or peppers, pruning suckers or extra stems can direct the plant's energy towards fruit production.
2. Deadheading and Cleaning
- Deadheading, or removing faded flowers, prevents plants from wasting energy on producing seeds and encourages more blooms.
- Regularly clean the leaves and stems to remove dust, debris, and any dead foliage that can attract pests.
- Check for fallen leaves or decaying plant material around the base of containers, as this can harbor pests or disease.
3. Pest Control for Container Plants
- Inspect plants regularly for pests like aphids, spider mites, or whiteflies, which are common in container gardens.
- Use organic pest control methods such as neem oil, insecticidal soap, or introducing beneficial insects like ladybugs to combat pests.
- Isolate affected plants if you notice an infestation to prevent it from spreading to other containers.
- Ensure good air circulation around your plants and avoid overwatering, which can lead to fungal issues and attract pests.
Pruning and regular maintenance are key to keeping your container garden healthy and productive. By staying on top of tasks like deadheading, cleaning, and pest control, you’ll ensure your plants remain vibrant and grow to their full potential.

9. Extending the Growing Season with Containers
Container gardening offers flexibility that can help extend the growing season, allowing gardeners to enjoy fresh produce and flowers for a longer period. With the ability to move containers and implement specific techniques, you can create optimal growing conditions regardless of the weather.
1. Flexibility in Container Gardening
- Containers can be easily relocated to take advantage of sunlight or shelter them from harsh weather conditions.
- During early spring or late fall, moving containers close to the house or into a garage can protect them from frost.
- In areas with mild winters, containers can allow for year-round gardening by simply moving plants to warmer locations.
2. Techniques to Extend the Growing Season
-
Moving Containers Indoors:
- During colder months, bring containers inside to protect tender plants from frost and freezing temperatures.
- Place them near sunny windows or under grow lights to ensure they receive adequate light.
-
Using Cloches and Row Covers:
- Covering plants with cloches or row covers can provide extra warmth and protection from chilly winds.
- These covers can help trap heat, creating a microclimate that allows for extended growth.
3. Winter Gardening with Containers
- Choose cold-hardy plants, such as kale, spinach, or certain herbs, that can survive winter conditions.
- Insulate containers with materials like straw bales or bubble wrap to protect roots from freezing.
- Consider using larger containers, which retain heat better than smaller ones, providing a more stable environment for winter crops.
- Place containers in sheltered locations, such as patios or porches, to reduce exposure to harsh elements.
By utilizing containers effectively, you can easily extend your gardening season, making it possible to grow a variety of plants throughout the year. This flexibility allows for creativity and experimentation, ensuring you can enjoy your garden's bounty even when the weather turns chilly.
10. Common Mistakes in Container Gardening and How to Avoid Them
Container gardening can be rewarding, but it's easy to make mistakes that can hinder plant growth and health. Both beginners and experienced gardeners may encounter challenges, but recognizing these common pitfalls and knowing how to avoid them can lead to a thriving container garden.
1. Typical Mistakes in Container Gardening
- Overwatering: One of the most common mistakes, which can lead to root rot and other diseases.
- Underestimating Container Size: Choosing containers that are too small can restrict root growth and stunt plant development.
- Poor Plant Selection: Not considering the specific needs of plants (light, water, space) can lead to poor growth.
- Ignoring Drainage: Using containers without adequate drainage holes can cause water to accumulate, leading to root issues.
2. Tips for Avoiding Issues
-
Monitor Watering:
- Check the moisture level of the soil regularly, allowing the top inch to dry out between waterings.
- Use self-watering containers or moisture meters for better control.
-
Select Appropriate Container Size:
- Choose containers that are at least 12 inches deep for most vegetables and larger plants.
- Consider the mature size of the plant when selecting container size.
-
Choose Compatible Plants:
- Group plants with similar light, water, and nutrient needs to ensure they thrive together.
- Research plant compatibility before combining them in a single container.
-
Ensure Proper Drainage:
- Always choose containers with drainage holes to prevent water accumulation.
- Add a layer of gravel or rocks at the bottom of containers to improve drainage.
3. Practical Solutions to Common Problems
- If you notice yellowing leaves, check for overwatering and adjust your watering schedule accordingly.
- For plants that seem stunted, consider repotting them into larger containers with fresh potting mix.
- Monitor for pests and use organic solutions to control infestations before they become severe.
By being aware of these common mistakes and implementing the suggested tips and solutions, you can enjoy a flourishing container garden that brings beauty and productivity to your outdoor space.
11. FAQ – Frequently Asked Questions
Here are some common questions about container gardening along with their answers:
-
What is the best container size for growing vegetables?
- Generally, containers should be at least 12 inches deep for most vegetables. Larger containers provide better stability and room for root growth.
-
How often should I water my container garden?
- Watering frequency depends on the plant type and environmental conditions, but a good rule of thumb is to check the top inch of soil and water when it feels dry.
-
Can I reuse potting soil for next season?
- Yes, you can reuse potting soil, but it’s best to refresh it with new nutrients and check for pests or diseases.
-
What are the best plants for container gardening?
- Popular choices include herbs (like basil and parsley), vegetables (like tomatoes and peppers), and ornamental plants (like petunias and geraniums).
-
How do I prevent pests in my container plants?
- Regularly inspect your plants for signs of pests, use organic pest control methods, and ensure good air circulation to minimize infestations.
12. Conclusion
Following these tips can significantly enhance your success in container gardening. Experimenting with various containers and plant types will help you discover what thrives best in your unique environment. Embrace the creativity container gardening offers and enjoy the rewards of your labor!
You May Also Like
The Science of Grow Lights for Indoor Plants: Enhancing Growth and Pro – XRoci
How to Start Seeds Indoors: A Step-by-Step Guide for New Gardeners – XRoci
Decorate Your Home with These Beautiful Low-Light Houseplants – XRoci
From Seed to Sprout: The Ultimate Guide to the Best Plants for Beginne – XRoci


